Looking to install a Chamberlain garage door opener and need a wiring diagram to guide you through the process? You’ve come to the right place! In this article, we’ll provide you with all the information you need to successfully wire your Chamberlain garage door opener.
Before we dive into the wiring diagram, it’s important to familiarize yourself with the different components of your Chamberlain garage door opener. Make sure you have all the necessary tools and materials on hand before you begin the installation process.

Related Post Leviton 3 Way Lighted Switch Wiring Diagram
Next, you’ll need to connect the opener’s motor unit to the garage door itself. This typically involves running wires from the motor unit to the door’s control panel, as well as to any additional accessories such as remote controls or keypads.
Once you have all the necessary connections in place, it’s important to test the opener to ensure that everything is functioning properly. Follow the manufacturer’s instructions for testing and adjusting the opener as needed.
With the wiring diagram in hand and a little bit of patience, you’ll have your Chamberlain garage door opener up and running in no time. If you encounter any difficulties during the installation process, don’t hesitate to reach out to Chamberlain’s customer support team for assistance.
In conclusion, wiring a Chamberlain garage door opener may seem like a daunting task, but with the right information and a little bit of know-how, you’ll be able to tackle the job with confidence. Follow the steps outlined in this article, and you’ll have your garage door opener wired and ready to go in no time!
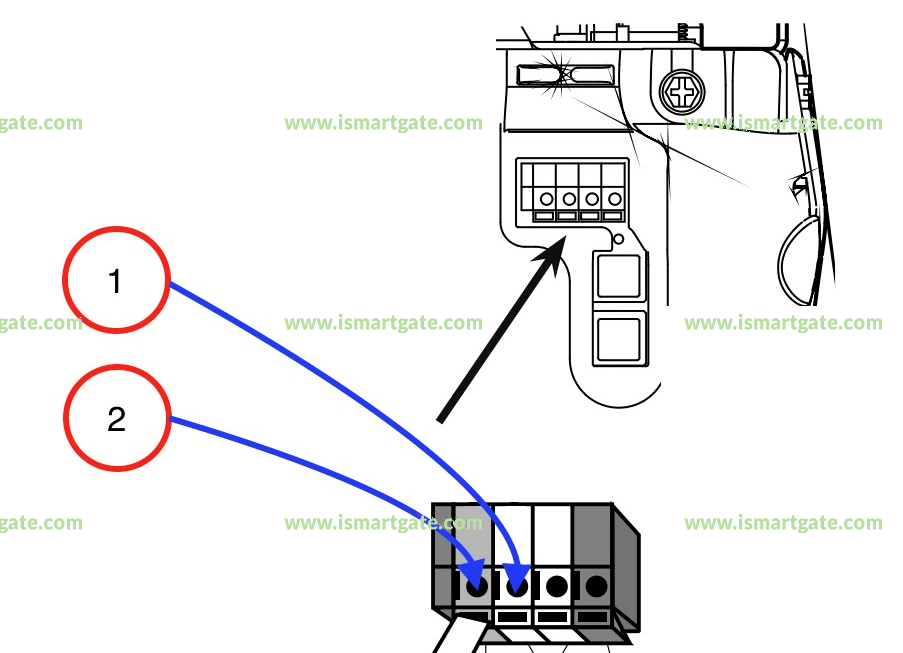
Download and Print Chamberlain Garage Door Opener Wiring Diagram Listed below