Looking to install a Coleman Mach 15 air conditioner in your RV? Understanding the wiring diagram is essential to ensure a smooth installation process. In this article, we will break down the Coleman Mach 15 wiring diagram in a simple and easy-to-understand way.
The Coleman Mach 15 is a popular choice for RV owners looking to stay cool during their travels. With its powerful cooling capabilities, it is important to properly wire the unit to ensure optimal performance. Let’s dive into the wiring diagram to see how it all comes together.

Related Post Rv Dual Battery Wiring Diagram
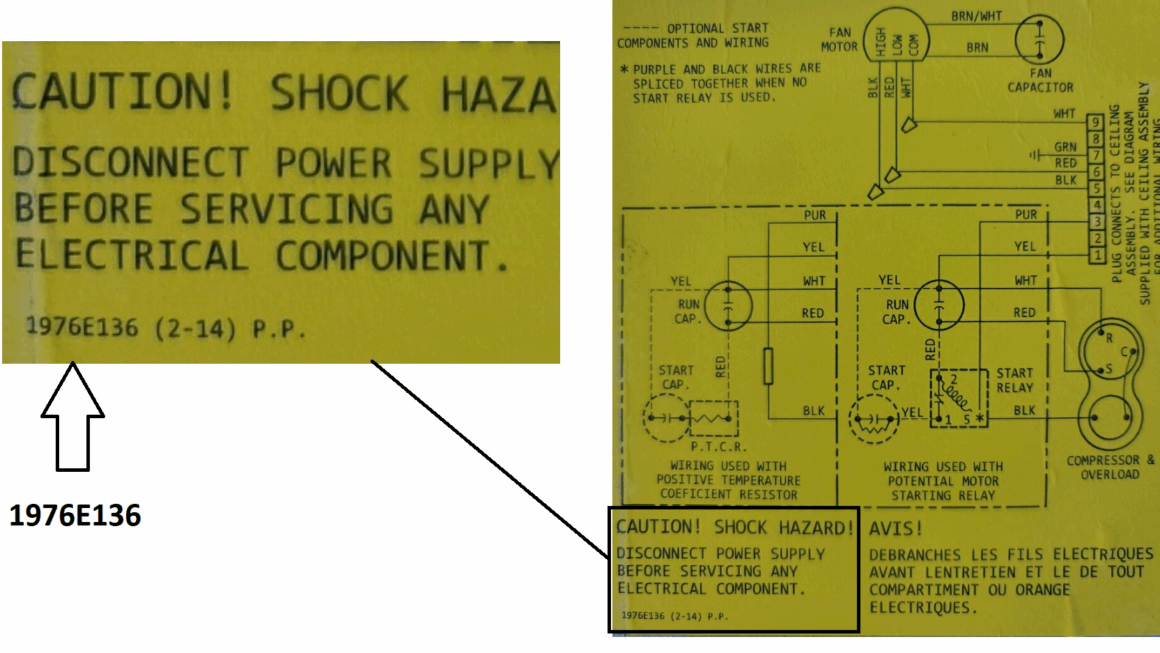
The wiring diagram will outline the different components of the air conditioner, such as the compressor, fan motor, and capacitors. Each component will have specific wiring instructions that need to be followed to ensure proper functioning. It is important to carefully follow these instructions to avoid any mishaps during the installation process.
One of the key components of the wiring diagram is the thermostat. The thermostat controls the temperature settings of the air conditioner and must be wired correctly for the unit to function properly. Make sure to double-check the wiring of the thermostat to avoid any issues down the line.
Once you have completed the wiring process according to the diagram, it is essential to test the unit to ensure everything is working as it should. Turn on the power and adjust the temperature settings to see if the air conditioner kicks in. If everything is working correctly, you can rest easy knowing that your Coleman Mach 15 is ready to keep you cool on your next RV adventure.
In conclusion, understanding the Coleman Mach 15 wiring diagram is crucial for a successful installation. By following the instructions provided and double-checking your work, you can ensure that your air conditioner operates efficiently. Stay cool and enjoy your travels with a properly wired Coleman Mach 15!
Download and Print Coleman Mach 15 Wiring Diagram Listed below