If you’re looking to set up your e-bike’s controller wiring and throttle, you’ve come to the right place. Ensuring that these components are properly connected is crucial for the smooth operation of your electric bike.
By following a simple wiring diagram, you can easily connect the controller and throttle to your e-bike. This will allow you to control the speed and power of your electric bike with ease.

Related Post 4L60E Neutral Safety Switch Wiring Diagram
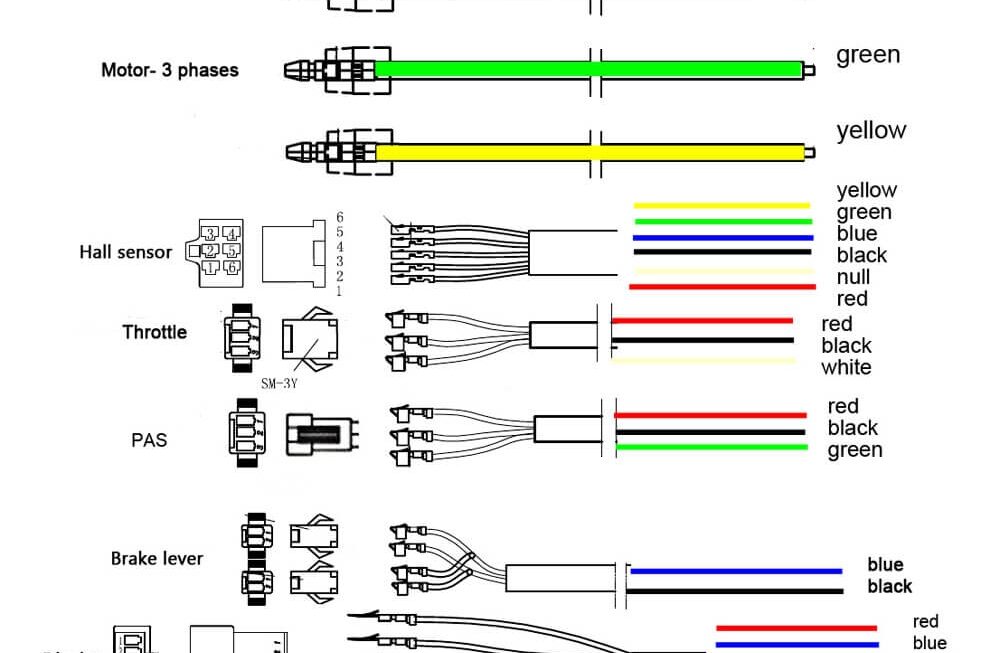
Next, you’ll need to connect the wires from the throttle to the corresponding wires on the controller. This usually involves matching the colors of the wires and securing them with wire connectors. It’s important to double-check your connections to ensure everything is properly linked.
Once the wires are securely connected, you can test the throttle to ensure that it’s working correctly. Give it a few twists and make sure that the motor responds accordingly. If everything is in order, you’re all set to hit the road with your newly wired e-bike!
Remember to always follow safety precautions when working with electrical components. Make sure to disconnect the battery before starting any wiring work and double-check all connections before powering up your e-bike.
In conclusion, setting up your e-bike’s controller wiring and throttle is a straightforward process that can be done with a bit of patience and attention to detail. By following a wiring diagram and ensuring proper connections, you’ll be cruising around on your electric bike in no time. Enjoy the ride!
Download and Print Controller Wiring E Bike Throttle Wiring Diagram Listed below