If you’re having trouble with your Cub Cadet ignition switch wiring diagram, you’re not alone. Many people struggle with understanding how to properly wire their ignition switch, but fear not – we’re here to help!
In this article, we’ll break down the process of wiring your Cub Cadet ignition switch step by step, so you can get back to enjoying your outdoor equipment with ease.

Related Post Stop/Turn/Tail Light Wiring Diagram
Next, carefully disconnect the battery to ensure your safety while working on the ignition switch wiring. Once the battery is disconnected, locate the ignition switch on your Cub Cadet and remove any surrounding panels or covers to access it.
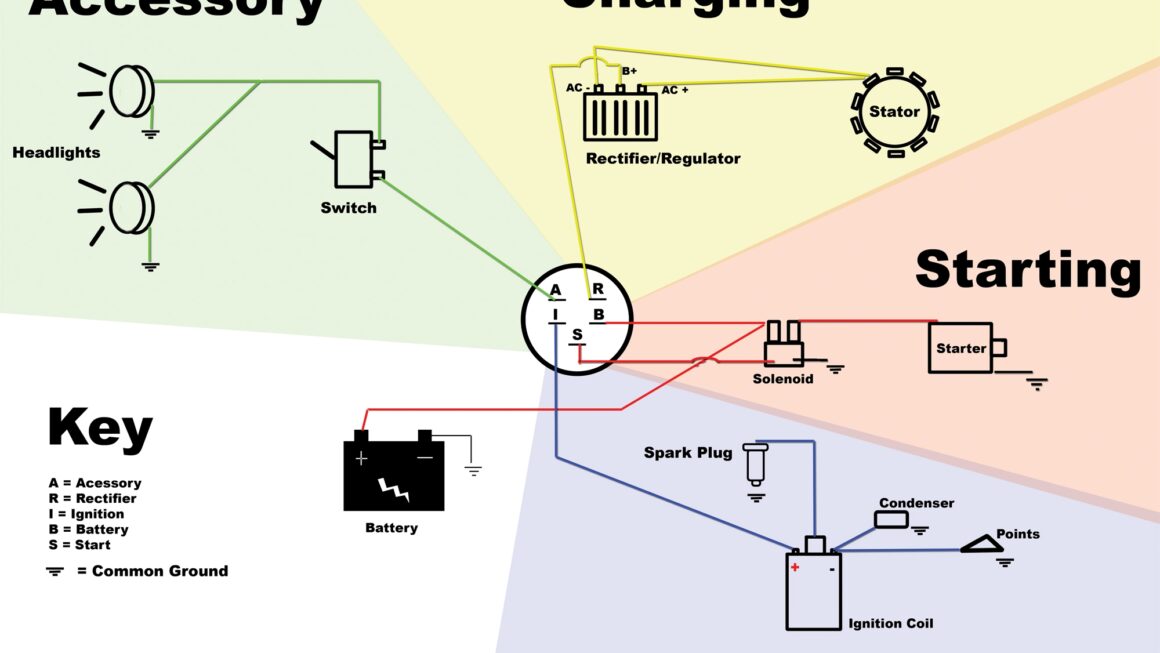
Refer to your wiring diagram to identify the correct wires that need to be connected to the ignition switch. Take your time and double-check each connection to avoid any potential issues down the line.
Once all the wires are properly connected to the ignition switch according to the wiring diagram, reassemble any panels or covers that were removed earlier. Finally, reconnect the battery and test the ignition switch to ensure everything is functioning correctly.
By following these steps and referring to your Cub Cadet ignition switch wiring diagram, you can successfully wire your ignition switch without any hassle. If you encounter any difficulties along the way, don’t hesitate to seek help from a professional or reach out to the manufacturer for guidance.
Now that you have a better understanding of how to wire your Cub Cadet ignition switch, you can confidently tackle this task on your own. Remember to prioritize safety and precision throughout the process to ensure long-lasting performance from your equipment.
Download and Print Cub Cadet Ignition Switch Wiring Diagram Listed below