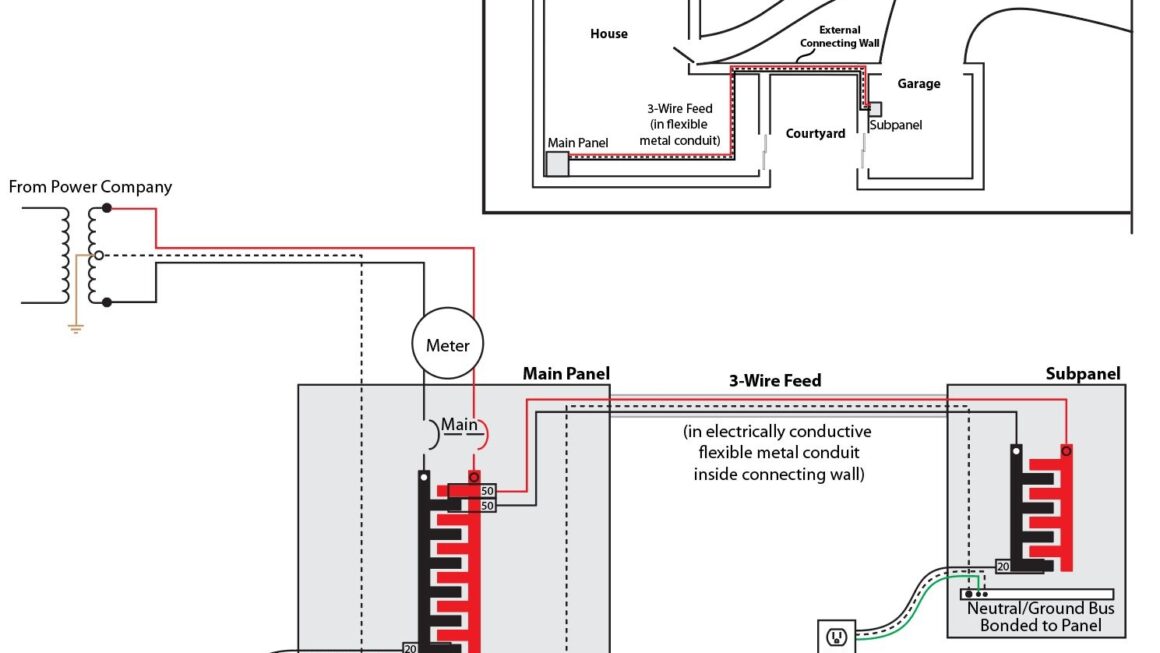
If you’re looking to add a detached garage to your property, it’s important to make sure that it has its own electrical sub panel. This will help ensure that your garage has the power it needs to run all of your tools and equipment.
One of the key steps in installing a sub panel in your detached garage is wiring it correctly. Having a proper wiring diagram is essential to ensure that everything is connected safely and efficiently. In this article, we’ll provide you with a detailed detached garage sub panel wiring diagram to help you get started.

Related Post Dc To Dc Charger Wiring Diagram
Start by installing a 100-amp circuit breaker in the main panel to feed the sub panel in the garage. Use a 2-gauge cable to connect the two panels, making sure to run the cable through PVC conduit to protect it from damage.
Inside the sub panel, connect the grounding and neutral bars to their respective bus bars. Connect the hot wires to the circuit breaker and the neutral wire to the neutral bar. Make sure all connections are tight and secure to prevent any issues down the line.
Once everything is wired correctly, test the sub panel to ensure that it is receiving power from the main panel. Double-check all connections and make any necessary adjustments before closing up the panels and turning on the power.
By following this detached garage sub panel wiring diagram and taking the necessary safety precautions, you can ensure that your new garage has the power it needs to function properly. If you’re unsure about any step of the process, don’t hesitate to consult with a professional electrician for guidance.
Now that you have a better understanding of how to wire a sub panel in your detached garage, you can tackle this project with confidence. Remember to prioritize safety and double-check your work to ensure a successful and efficient electrical installation.
Download and Print Detached Garage Sub Panel Wiring Diagram Listed below