If you’re looking to upgrade your vehicle’s cooling system, installing dual electric fans can be a game-changer. Not only do they provide better airflow, but they also help improve engine performance.
However, figuring out how to wire them can be a bit daunting for beginners. That’s where a dual electric fan wiring diagram comes in handy. It provides a visual guide on how to properly connect the fans to your vehicle’s electrical system.

Related Post Holley Sniper Efi Wiring Diagram
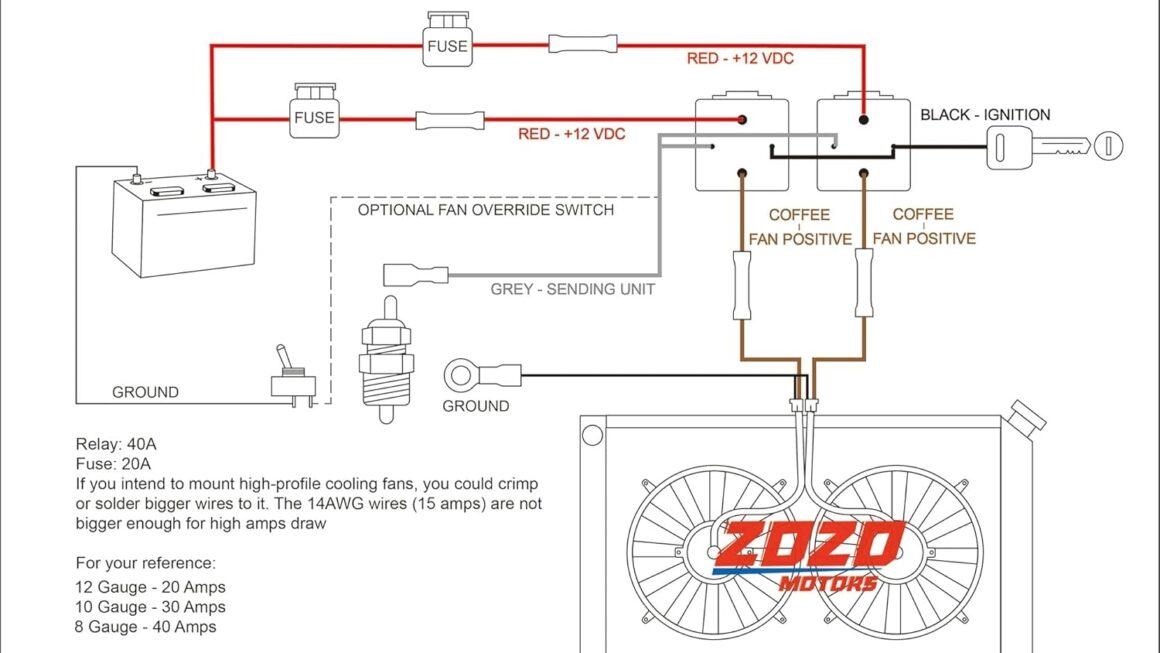
One of the key things to remember when wiring dual electric fans is to ensure that they are connected in parallel. This means that both fans are wired separately to the power source and ground, rather than in series where they would share the same power source.
Start by identifying the positive and negative terminals on each fan. Then, connect the positive terminals of both fans to the positive lead from the power source, and the negative terminals to the negative lead. Make sure to use crimp connectors to secure the connections and prevent any loose wiring.
Once you have wired the fans correctly, double-check your connections before reattaching the battery and testing the fans. If everything is in order, you should notice a significant improvement in your vehicle’s cooling system efficiency.
Remember, if you’re not comfortable working with electrical systems, it’s always best to consult a professional to ensure the job is done safely and correctly. With the help of a dual electric fan wiring diagram and a little bit of patience, you can enjoy a cooler and more efficient ride in no time.
So, don’t wait any longer – upgrade your vehicle’s cooling system with dual electric fans today and experience the benefits firsthand!
Download and Print Dual Electric Fan Wiring Diagram Listed below