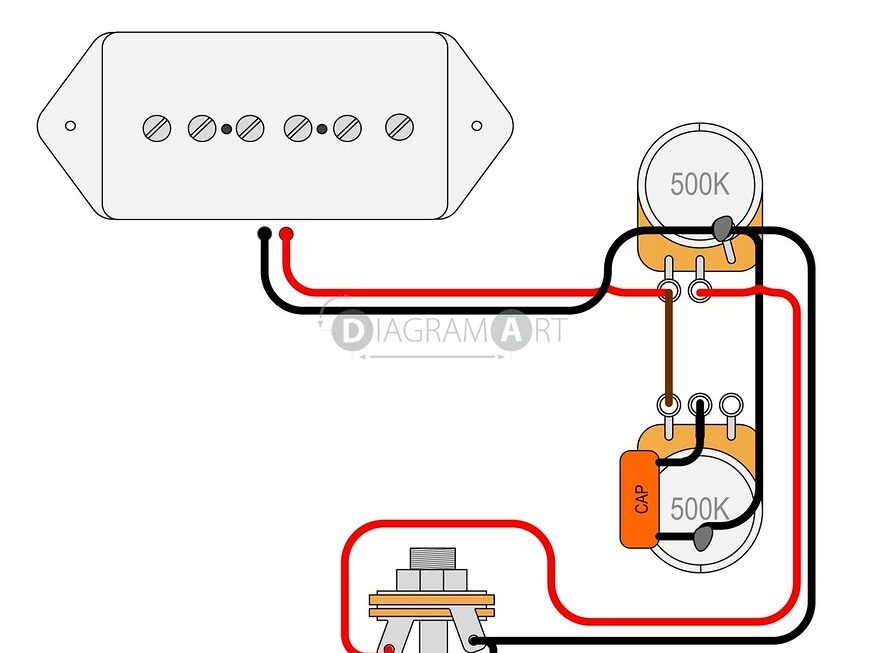
If you’re a guitar enthusiast or a DIY musician, knowing how to wire your Epiphone Les Paul can come in handy. Whether you’re looking to upgrade your pickups or just want to understand how your guitar works, having a wiring diagram can make the process much easier.
By following a wiring diagram specific to your Epiphone Les Paul model, you can easily identify the different components and their connections. This knowledge can help you troubleshoot any issues with your guitar’s electronics and even customize your sound by experimenting with different wiring configurations.

Related Post Eagle 15 Watt 120 Volt Switches Ws896 Wiring Diagram
Most Epiphone Les Paul models come with a standard wiring setup that includes two volume controls, two tone controls, and a three-way pickup selector switch. If you’re looking to upgrade or modify your wiring, there are plenty of resources online that offer wiring diagrams for different configurations.
Before you start any wiring modifications, make sure to disconnect your guitar from the amplifier and remove the strings to avoid any accidents. Take your time to study the wiring diagram and double-check your connections to ensure everything is in the right place.
Once you’ve completed the wiring process, reassemble your guitar and test it out to see if everything is working as it should. If you encounter any issues, refer back to the wiring diagram and troubleshoot the connections until you get it right.
With a little bit of patience and the right tools, wiring your Epiphone Les Paul can be a rewarding experience that enhances your understanding of your instrument and opens up a world of possibilities for customizing your sound. So go ahead, grab your soldering iron, and start exploring the world of guitar electronics!
Download and Print Epiphone Les Paul Wiring Diagram Listed below