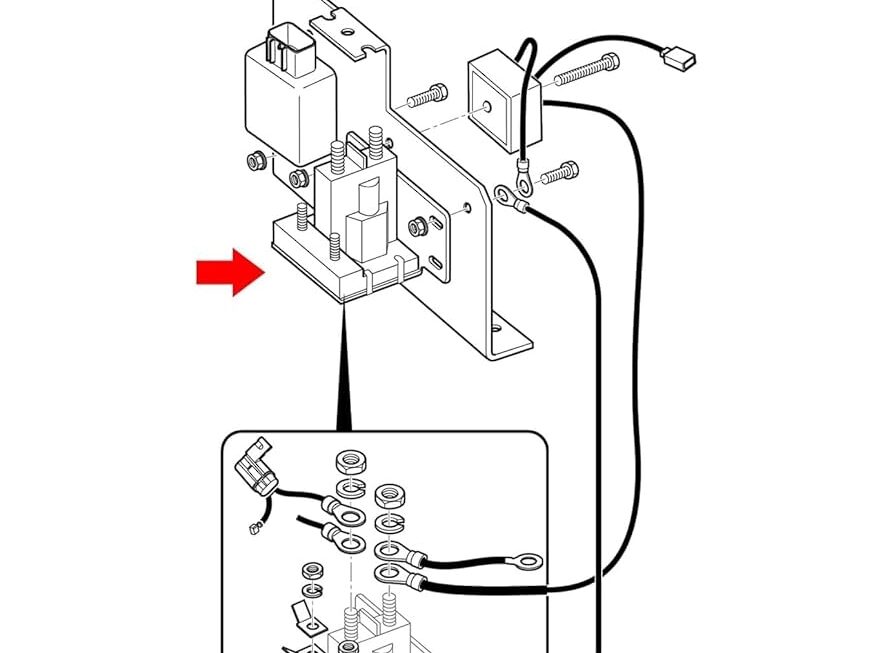
If you’re looking to understand how to wire a solenoid for your Ezgo golf cart, you’ve come to the right place. Knowing the wiring diagram is essential for proper installation and maintenance of your golf cart.
Whether you’re a seasoned mechanic or a DIY enthusiast, having a clear diagram can make the process much easier. With the right information at your fingertips, you can ensure that your golf cart operates smoothly and efficiently.

Related Post Gm Turn Signal Wiring Diagram
Next, carefully study the diagram to understand the various components and their corresponding connections. Make sure to follow the color-coding and labeling to avoid any confusion during the installation process.
Once you have a clear understanding of the wiring diagram, begin connecting the wires according to the instructions provided. Take your time and double-check each connection to ensure everything is secure and properly linked.
After all the connections have been made, test the solenoid to ensure that it is functioning correctly. You can do this by engaging the solenoid and checking for any signs of malfunction. If everything looks good, you’re all set!
In conclusion, having a reliable Ezgo golf cart solenoid wiring diagram is crucial for maintaining your golf cart’s electrical system. By following the diagram carefully and taking the necessary precautions, you can ensure that your golf cart runs smoothly and efficiently for years to come.
Download and Print Ezgo Golf Cart Solenoid Wiring Diagram Listed below

Related Post Travel Trailer 50 Amp Rv Plug Wiring Diagram