Are you looking for a reliable fan control relay wiring diagram for your 2010 Honda Civic? Look no further! In this article, we will guide you through the process of understanding and installing the fan control relay in your vehicle.
Understanding how the fan control relay works is essential for ensuring your vehicle’s cooling system operates efficiently. The fan control relay is responsible for turning the cooling fan on and off based on the temperature of the engine. If the relay is faulty, it can lead to overheating and potential engine damage.

Related Post Breaker Shunt Trip Wiring Diagram
It is essential to follow the wiring diagram carefully to ensure proper installation. Start by disconnecting the battery to avoid any electrical mishaps. Then, identify the wires that correspond to the fan control relay and the cooling fan. Make sure to double-check your connections before reattaching the battery.
After you have successfully installed the fan control relay according to the wiring diagram, test the cooling fan to ensure it turns on and off as intended. You can do this by running the engine and monitoring the temperature gauge. If the fan does not turn on, double-check your connections and consult the wiring diagram again.
Once you have confirmed that the fan control relay is functioning correctly, you can rest assured that your 2010 Honda Civic’s cooling system is in good working order. Regularly inspecting and maintaining the fan control relay will help prevent any overheating issues and keep your engine running smoothly.
In conclusion, understanding and installing the fan control relay in your 2010 Honda Civic is crucial for maintaining the health of your vehicle’s cooling system. By following the wiring diagram and proper installation procedures, you can ensure your car stays cool and reliable on the road. Happy driving!
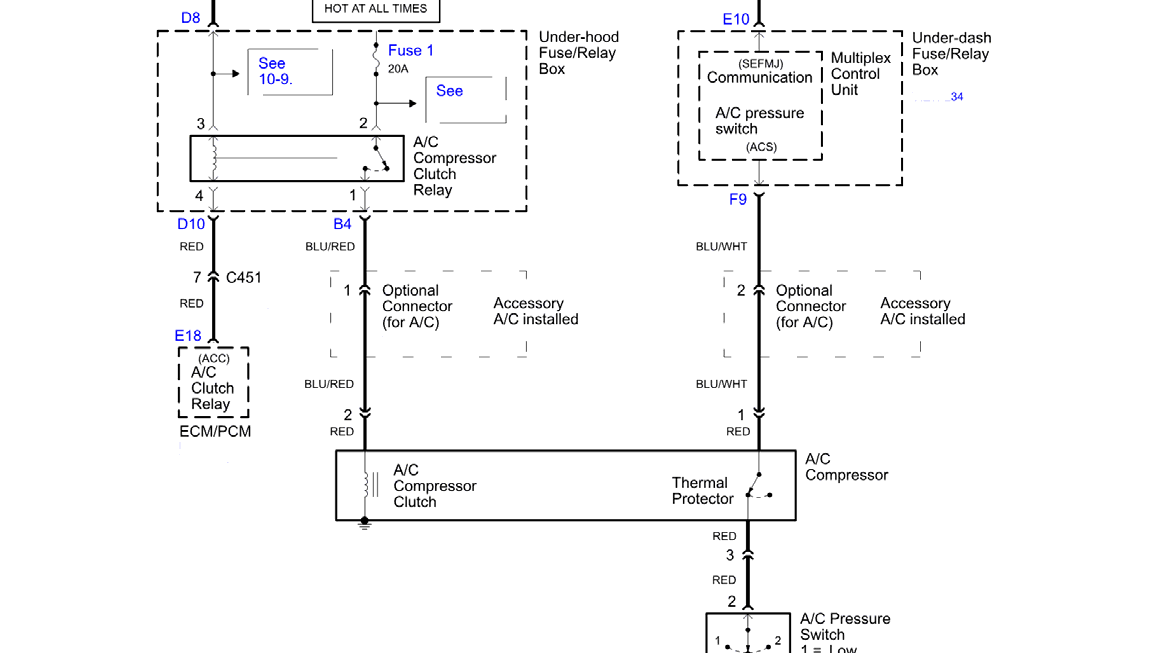
Download and Print Fan Control Relay 20210 Honda Civic Wiring Diagram Listed below