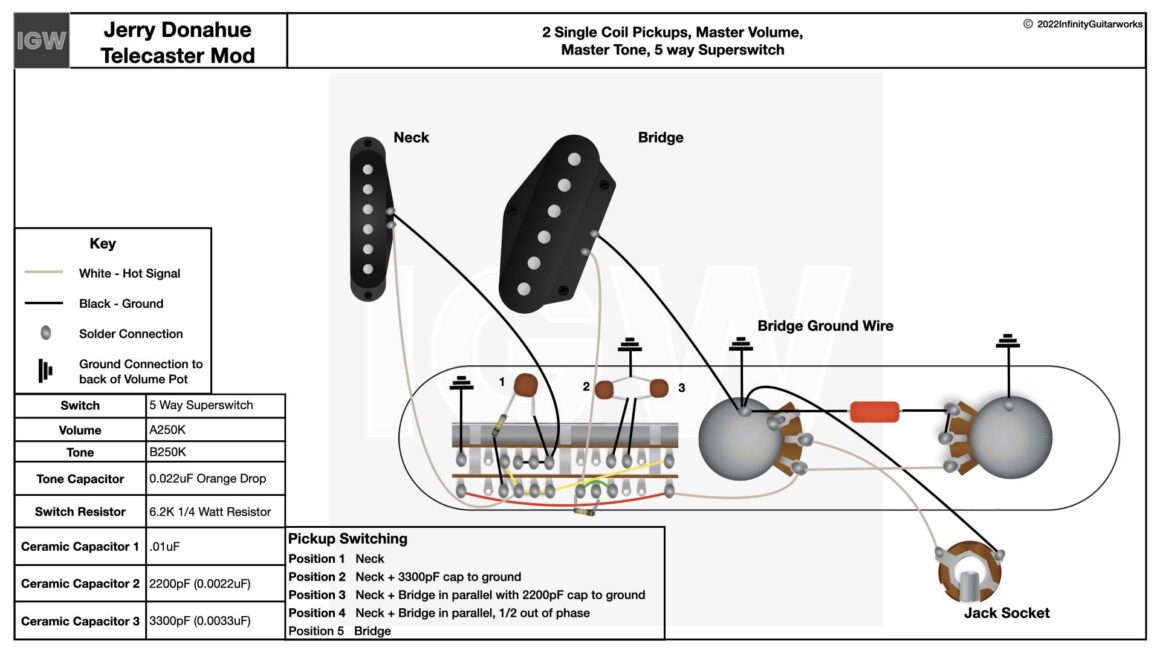
If you’re a guitar enthusiast looking to customize your Fret King Black Label Jerry Donahue, you’ve come to the right place! In this article, we’ll provide you with a detailed wiring diagram to help you achieve the sound you desire.
Modifying the wiring of your guitar can significantly impact its tone and playability. With the right diagram and a little bit of know-how, you can unleash the full potential of your Fret King Black Label Jerry Donahue.

Related Post Blower Motor Wiring Diagram Manual
The first step is to carefully remove the existing wiring from your guitar. Take note of how everything is connected before proceeding. Once you’ve removed the old wiring, refer to the diagram provided to map out the new connections.
When soldering the new connections, make sure to heat the components properly to ensure a secure bond. Take your time and double-check each connection to avoid any potential issues down the road. Once you’ve completed the wiring process, reassemble your guitar and test it out.
With the new wiring in place, you’ll likely notice a significant improvement in the overall tone and versatility of your Fret King Black Label Jerry Donahue. Experiment with different pickup configurations and settings to find the sound that best suits your playing style.
Whether you’re a seasoned guitarist or a DIY enthusiast, customizing the wiring of your Fret King Black Label Jerry Donahue can be a rewarding experience. With the right tools, materials, and know-how, you can take your guitar playing to the next level.
So what are you waiting for? Grab your soldering iron and get ready to unleash the full potential of your Fret King Black Label Jerry Donahue with our detailed wiring diagram. Your ears (and your audience) will thank you!
Download and Print Fret King Black Label Jerry Donahue Wiring Diagram Listed below