If you’re looking to upgrade or replace the alternator in your vehicle, understanding how to wire a GM 3 wire alternator is crucial. This simple yet essential task can save you time and money in the long run.
By following a wiring diagram specific to the GM 3 wire alternator, you can ensure that your vehicle’s electrical system operates efficiently and effectively. With the right tools and knowledge, you can easily complete this task on your own.

Related Post Western Plow Solenoid Wiring Diagram
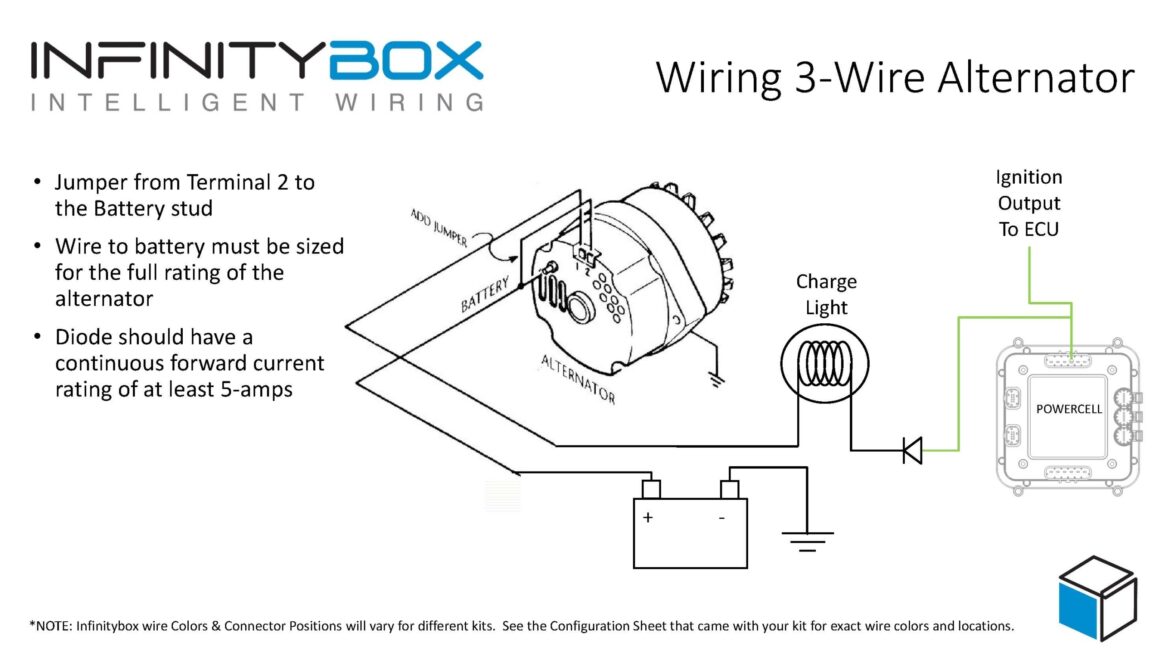
Gm 3 Wire Alternator Wiring Diagram
The GM 3 wire alternator wiring diagram consists of three main connections: the battery, the field wire, and the ground wire. Each connection plays a vital role in ensuring that the alternator functions properly and charges the battery effectively.
First, connect the battery wire to the alternator’s main stud terminal. This connection provides power to the alternator and allows it to generate electricity to charge the battery. Make sure this connection is secure and free of any corrosion.
Next, connect the field wire to the alternator’s “F” terminal. This wire provides the necessary signal to the alternator to start generating power. Without this connection, the alternator will not function correctly, leading to a dead battery and other electrical issues.
Finally, connect the ground wire to the alternator’s case or mounting bracket. This connection ensures that the alternator has a proper ground, allowing it to operate efficiently and effectively. A secure ground connection is essential for the overall performance of the alternator.
In conclusion, understanding how to wire a GM 3 wire alternator is essential for maintaining your vehicle’s electrical system. By following a simple wiring diagram and ensuring all connections are secure, you can ensure that your alternator functions properly and keeps your battery charged. With a little knowledge and effort, you can tackle this task with confidence.
Download and Print Gm 3 Wire Alternator Wiring Diagram Listed below