Looking to install a new alternator in your vehicle? Understanding how to wire a GM 4 wire alternator is crucial for a successful installation. With the right wiring diagram, you can easily connect your alternator and ensure it works properly.
Whether you’re upgrading your existing alternator or replacing a faulty one, knowing the correct wiring diagram is key. This guide will walk you through the process of wiring a GM 4 wire alternator, making it a simple and hassle-free task.

Related Post Wiring Diagram Liftmaster Garage Door Opener
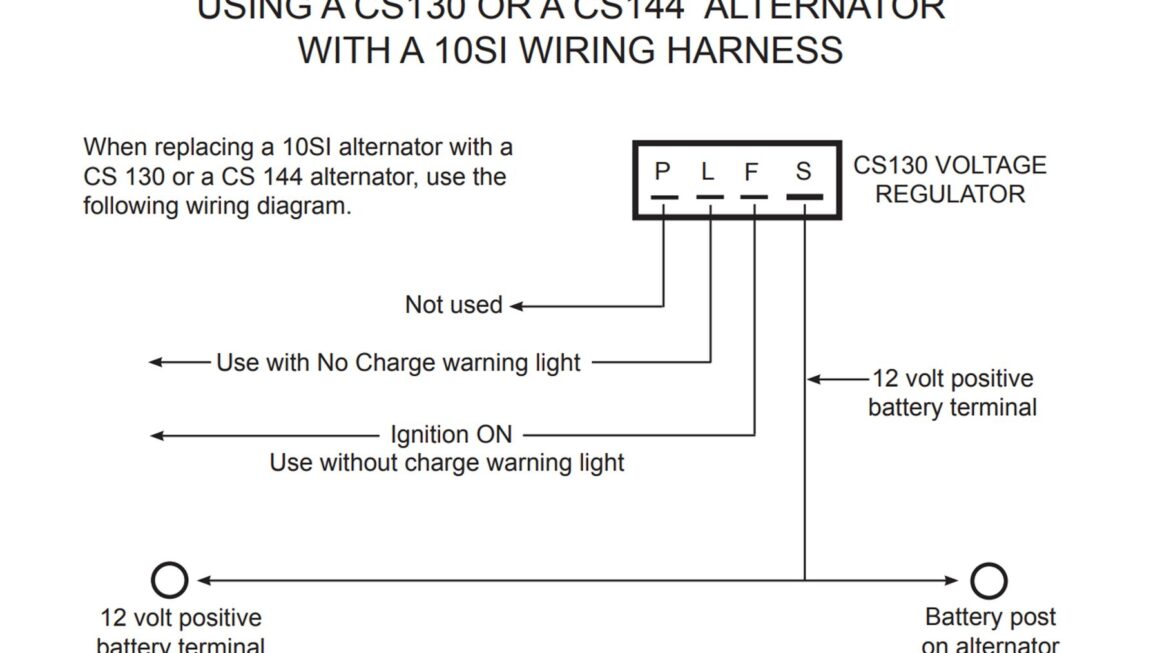
Next, connect the S terminal to the vehicle’s ignition switch. This terminal provides power to the alternator when the ignition is turned on. The L terminal is used to connect the alternator warning light, which alerts you to any potential issues with the charging system.
Once you have identified and connected the terminals, double-check your wiring to ensure everything is secure and in the correct position. A proper connection is essential for the alternator to function correctly and charge your vehicle’s battery effectively.
After wiring the GM 4 wire alternator according to the diagram, start your vehicle and monitor the charging system. If everything is connected correctly, the alternator should begin charging the battery, providing power to the vehicle’s electrical components.
In conclusion, understanding how to wire a GM 4 wire alternator is essential for any vehicle owner or DIY enthusiast. By following the correct wiring diagram and connecting the terminals properly, you can ensure that your alternator functions correctly and keeps your vehicle running smoothly.
Download and Print Gm 4 Wire Alternator Wiring Diagram Listed below