If you’re looking for a reliable and efficient way to power your vehicle’s electrical system, a GM alternator is a great option. But before you can install it, you’ll need to understand the wiring diagram for the 3-wire setup.
With the right knowledge and tools, you can easily wire up your GM alternator in no time. In this guide, we’ll walk you through the steps to create a seamless and functional electrical system for your vehicle.

Related Post 3 Wire Tail Light Wiring Diagram
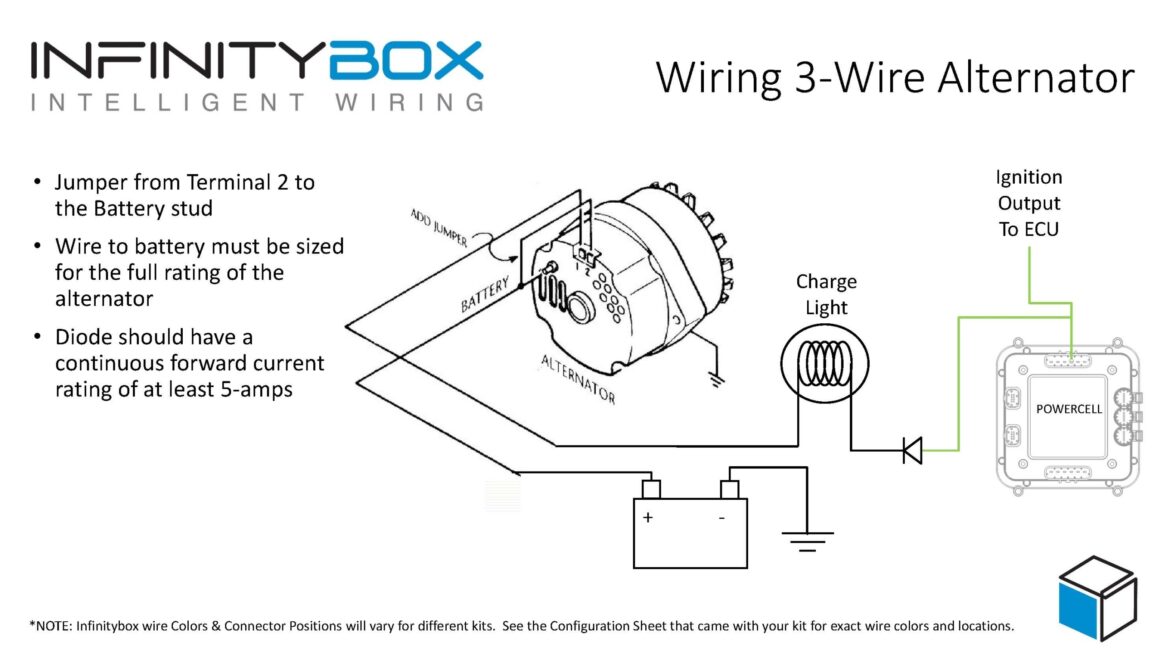
Next, you’ll need to connect the BAT terminal to the main power source of your vehicle. This will ensure that the alternator is receiving the necessary power to function properly. Make sure to use the appropriate gauge wire for this connection to avoid any issues with power distribution.
Then, connect the S terminal to the voltage regulator signal wire. This wire is responsible for regulating the voltage output of the alternator to ensure that it matches the electrical needs of your vehicle. Without this connection, your alternator may not function correctly, leading to potential issues with your vehicle’s electrical system.
Finally, connect the L terminal to the warning light wire. This wire is essential for alerting you to any potential issues with your alternator or electrical system. By connecting it to the L terminal, you’ll ensure that you’re always aware of the status of your alternator and can address any problems promptly.
In conclusion, understanding the wiring diagram for a 3-wire GM alternator is crucial for a successful installation. By following these steps and ensuring proper connections, you can enjoy a reliable and efficient electrical system for your vehicle. So, don’t hesitate to tackle this project and reap the benefits of a well-wired alternator!
Download and Print Gm Alternator Wiring Diagram 3 Wire Listed below