If you’re a guitar enthusiast looking to upgrade your Goldtop LP One Pickup with a 50’s wiring diagram, you’ve come to the right place. This simple modification can enhance your guitar’s tone and give it that classic vintage sound you’ve been craving.
With just a few tweaks to the wiring, you can unlock a whole new world of tonal possibilities for your Goldtop LP. Whether you’re a seasoned player or just starting out, this upgrade is sure to take your playing to the next level.

Related Post Starter Relay Solenoid Wiring Diagram
Next, carefully remove the back plate of your guitar to access the electronics. Take your time and be gentle to avoid damaging any components. Once you have everything exposed, refer to the wiring diagram to identify the connections you’ll need to modify.
Using your soldering iron, carefully remove the existing connections and replace them following the 50’s wiring diagram. Take your time with this step to ensure everything is connected properly. Once you’ve made the necessary changes, reassemble your guitar and give it a test run.
You’ll be amazed at the difference this simple upgrade can make to your Goldtop LP One Pickup. The 50’s wiring diagram will give your guitar a warmer, more responsive tone that is perfect for blues, rock, or any genre you prefer. So why wait? Start your upgrade today and unleash the true potential of your Goldtop LP.
In conclusion, upgrading your Goldtop LP One Pickup with a 50’s wiring diagram is a simple and effective way to enhance your guitar’s tone. With just a few adjustments, you can achieve that classic vintage sound you’ve always wanted. So grab your tools and get started on this exciting project today!
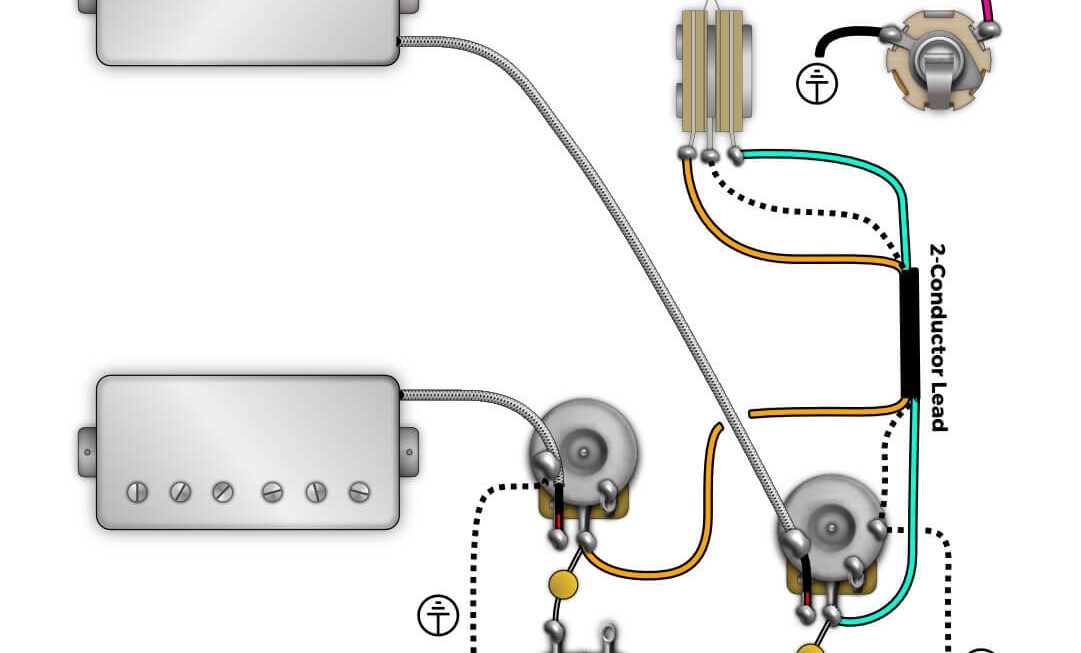
Download and Print Goldtop Lp One Pickup 50’S Wiring Diagram Listed below