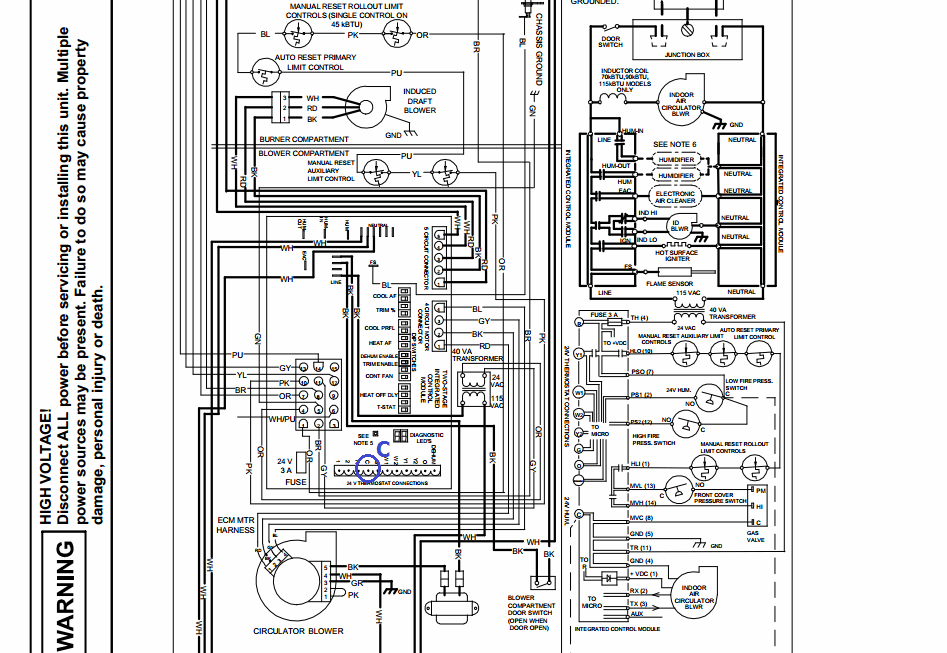
If you’re looking to install or replace a Goodman furnace control board, having a wiring diagram on hand can make the job much easier. Understanding how to properly connect the various wires is crucial for ensuring your furnace functions correctly.
Goodman furnace control board wiring diagrams are essential tools that provide a visual representation of the connections between different components. By following the diagram carefully, you can avoid costly mistakes and ensure that your furnace operates smoothly.

Related Post Wiring Diagram For Rocker Switch
Start by locating the wiring diagram for your specific Goodman furnace model. This diagram will typically be found in the installation manual or on the inside cover of the furnace. Take the time to study the diagram and make note of any important details or specific instructions.
When connecting the wires to the control board, be sure to follow the color-coding provided in the wiring diagram. This will help you accurately match each wire to its corresponding terminal on the board, reducing the risk of errors or malfunctions.
Once all the wires have been properly connected, double-check your work to ensure that everything is in order. Turn on the furnace and test its operation to confirm that the control board is functioning correctly. If you encounter any issues, refer back to the wiring diagram for troubleshooting tips.
By following the Goodman furnace control board wiring diagram carefully and methodically, you can successfully install or replace the control board without any hiccups. Remember to take your time, pay attention to detail, and seek professional assistance if needed.
Installing a Goodman furnace control board may seem daunting at first, but with the right tools and knowledge, you can tackle the job with confidence. By utilizing a wiring diagram and following the recommended steps, you’ll have your furnace up and running in no time.
Download and Print Goodman Furnace Control Board Wiring Diagram Listed below