Are you a guitar enthusiast looking to understand how to wire your guitar output jack? Look no further! In this article, we’ll provide you with a detailed guitar output jack wiring diagram to help you navigate this process with ease.
Understanding how to wire your guitar output jack is essential for any guitarist looking to make modifications or repairs to their instrument. By following a wiring diagram, you can ensure that your guitar’s output jack is properly connected and functioning correctly.

Related Post Three Wire Alternator Wiring Diagram
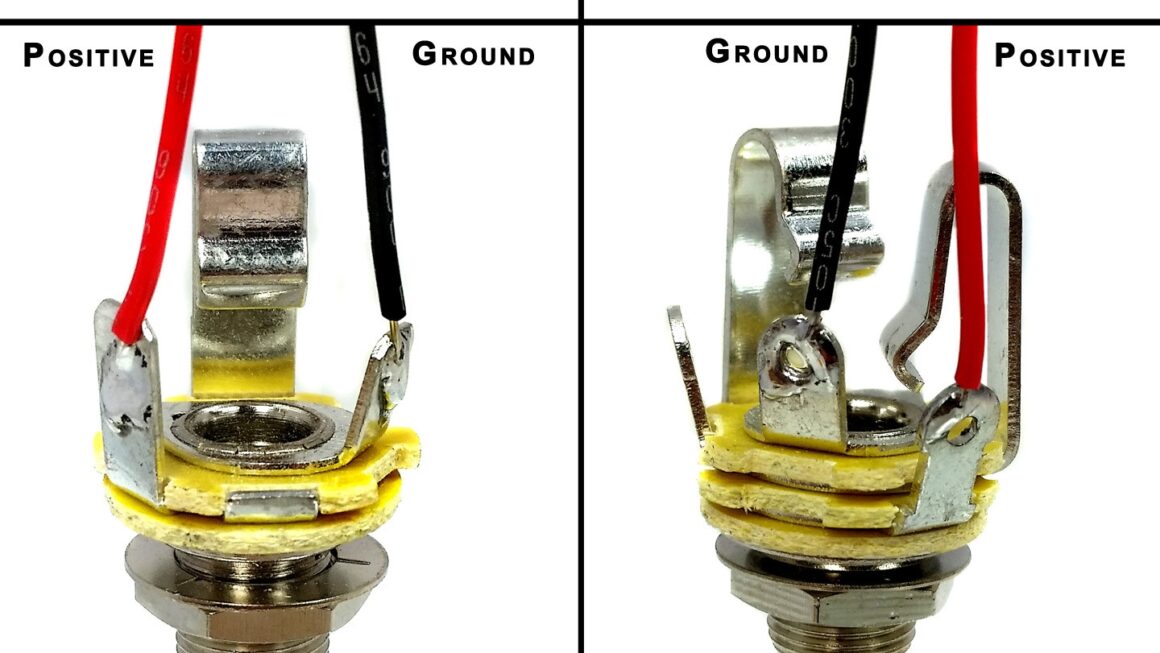
Typically, a guitar output jack will have three terminals: tip, ring, and sleeve. The tip is usually connected to the hot wire of the pickup, the ring to the ground wire, and the sleeve to the guitar’s ground connection. Following the diagram will help you connect these wires properly.
If you’re unsure about how to read a wiring diagram or how to solder the wires to the output jack, there are plenty of online tutorials and resources available to guide you through the process. Don’t be afraid to ask for help if you need it!
Once you’ve successfully wired your guitar output jack according to the diagram, you can test it out by plugging in your guitar and checking for any sound output. If everything is connected correctly, you should hear the sound coming through your amplifier loud and clear!
In conclusion, understanding how to wire your guitar output jack is a valuable skill for any guitarist. By following a wiring diagram and paying attention to the specific connections, you can ensure that your guitar is in perfect working order. So grab your soldering iron and get ready to rock out with your newly wired guitar output jack!
Download and Print Guitar Output Jack Wiring Diagram Listed below