If you’re looking to install a Holley Terminator X system in your vehicle, you’ll need a wiring diagram to guide you through the process. Luckily, we’ve got you covered with all the information you need to get started.
Understanding the wiring diagram is crucial to ensure that the installation goes smoothly and that everything is connected correctly. It may seem daunting at first, but with the right guidance, you’ll be able to tackle this project with confidence.

Related Post 208 Volt Single Phase Wiring Diagram
Before you begin the installation process, take the time to study the wiring diagram carefully. Make sure you understand each connection and how it relates to the overall functioning of the system. This will help you troubleshoot any issues that may arise during the installation.
Once you have a good grasp of the wiring diagram, it’s time to start the installation process. Follow the instructions closely, referring back to the diagram as needed to ensure that each component is connected correctly. Take your time and double-check your work to avoid any mistakes.
After completing the installation, don’t forget to test the system to ensure everything is functioning properly. Use the wiring diagram as a reference point to troubleshoot any issues that may arise. With a little patience and attention to detail, you’ll have your Holley Terminator X system up and running in no time.
In conclusion, having a thorough understanding of the Holley Terminator X wiring diagram is essential for a successful installation. By taking the time to study the diagram, follow the instructions carefully, and test the system after installation, you’ll be able to enjoy all the benefits of this advanced system in your vehicle.
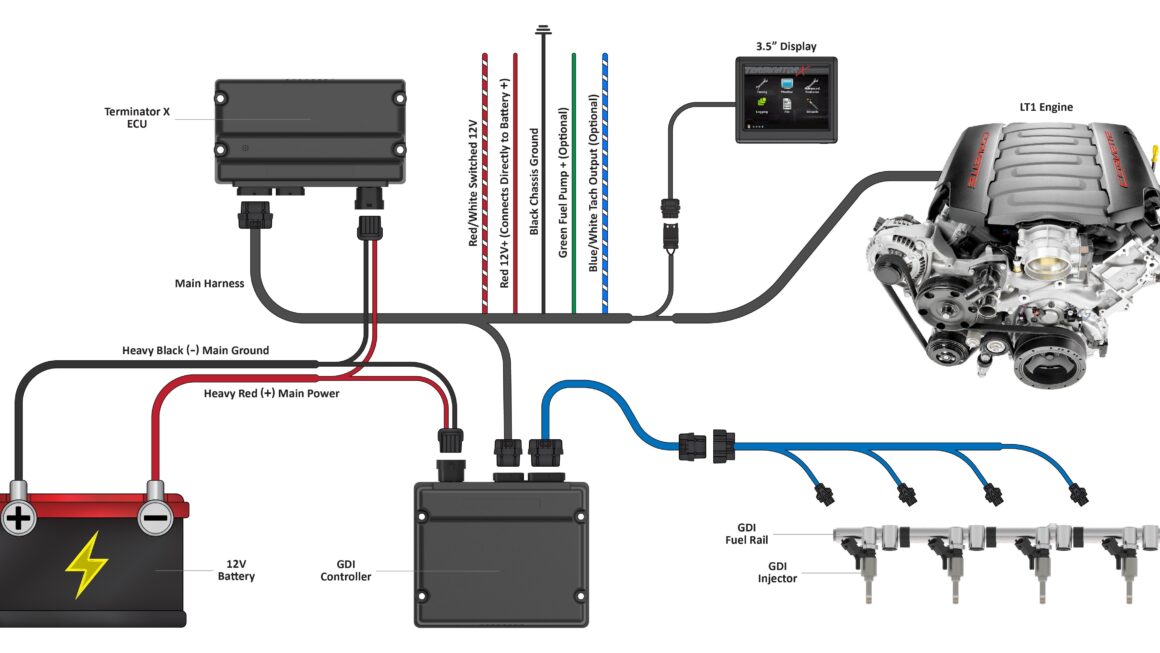
Download and Print Holley Terminator X Wiring Diagram Listed below