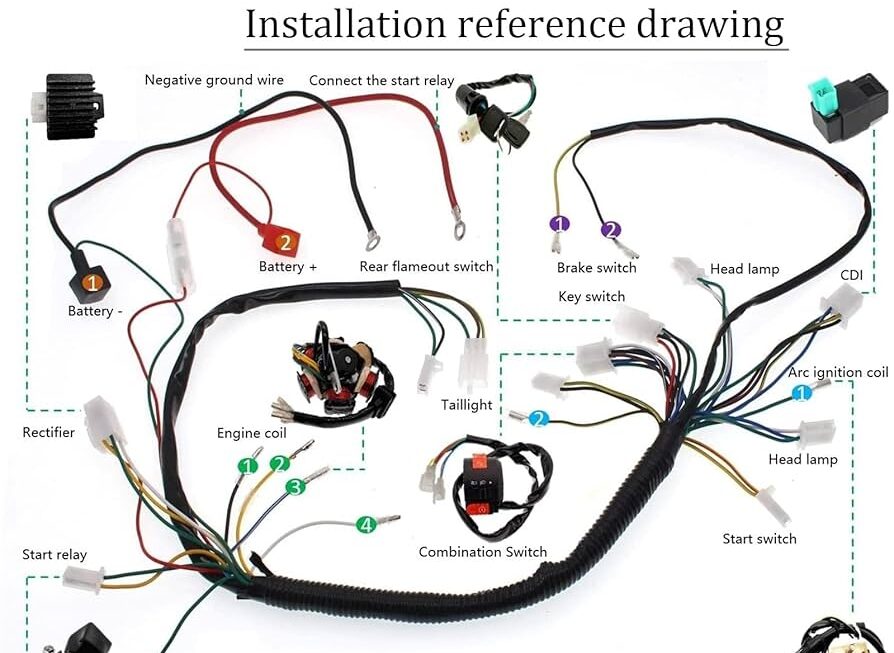
Looking to upgrade your Gy6 150cc scooter with a new ignition switch? You’ve come to the right place! Installing a new ignition switch can be a great way to improve the performance of your scooter and ensure it starts smoothly every time.
But before you dive into the installation process, it’s important to have a good understanding of the wiring diagram for your Gy6 150cc CDI ignition switch. This will help you navigate the installation process with ease and ensure everything is connected correctly.

Related Post Ez Go Golf Cart 36 Volt Wiring Diagrams
When looking at the wiring diagram, pay close attention to the color-coding of the wires. Each wire serves a specific purpose and must be connected to the correct component for the ignition switch to function properly. Mixing up the wires can lead to issues such as a no-start condition or even damage to the electrical system.
If you’re unsure about any aspect of the wiring diagram or installation process, don’t hesitate to seek help from a professional or consult online resources for guidance. It’s better to take your time and ensure everything is done correctly rather than rush through the installation and risk damaging your scooter.
Once you have successfully connected all the components according to the wiring diagram, double-check your work to ensure everything is secure and properly connected. Test the ignition switch to make sure it starts your scooter smoothly and without any issues. If everything checks out, you’re good to go!
By following the wiring diagram for your Gy6 150cc CDI ignition switch, you can upgrade your scooter with confidence and enjoy improved performance and reliability. So go ahead, grab your tools, and get ready to take your scooter to the next level!
Download and Print Ignition Switch Gy6 150Cc Cdi Wiring Diagram Listed below

Related Post Wiring Diagram Club Car Ds