Are you looking to install a dual fire coil on your Harley motorcycle but not sure how to wire it up? Look no further, as we have a detailed wiring diagram to guide you through the process.
Ignition systems are crucial components of any motorcycle, and getting the wiring right is essential for optimal performance. With our easy-to-follow diagram, you’ll have your Harley up and running in no time.

Related Post Wiring Diagram For A Western Snow Plow
Start by disconnecting the battery to avoid any electrical mishaps. Then, locate the ignition module on your Harley and remove the cover to access the wiring. Follow the color-coding on our diagram to ensure each wire is connected correctly.
Next, connect the dual fire coil to the ignition module according to the diagram. Make sure the connections are secure to prevent any loose wiring that could lead to issues down the line. Double-check all connections before proceeding.
Once you’ve completed the wiring, reassemble any components you removed earlier and reconnect the battery. Turn on the ignition and start your Harley to test the new dual fire coil. If everything is working correctly, you’re good to go!
With our detailed wiring diagram, installing a dual fire coil on your Harley is a breeze. Say goodbye to complicated wiring processes and hello to a smooth ignition system that enhances your motorcycle’s performance. Ride on with confidence knowing your Harley is in top-notch condition!
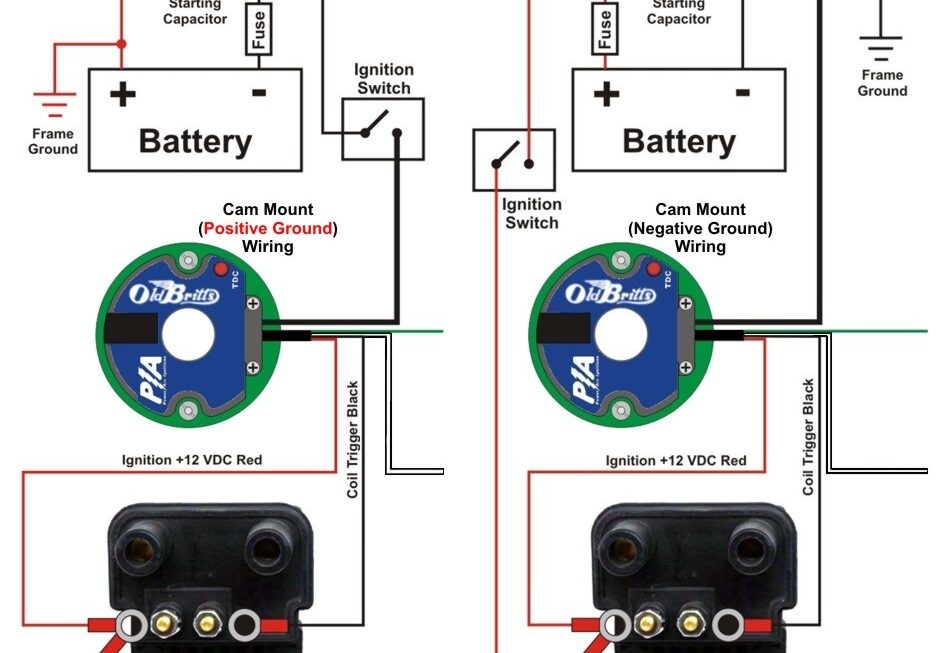
Download and Print Ignition Wiring Harley Dual Fire Coil Wiring Diagram Listed below