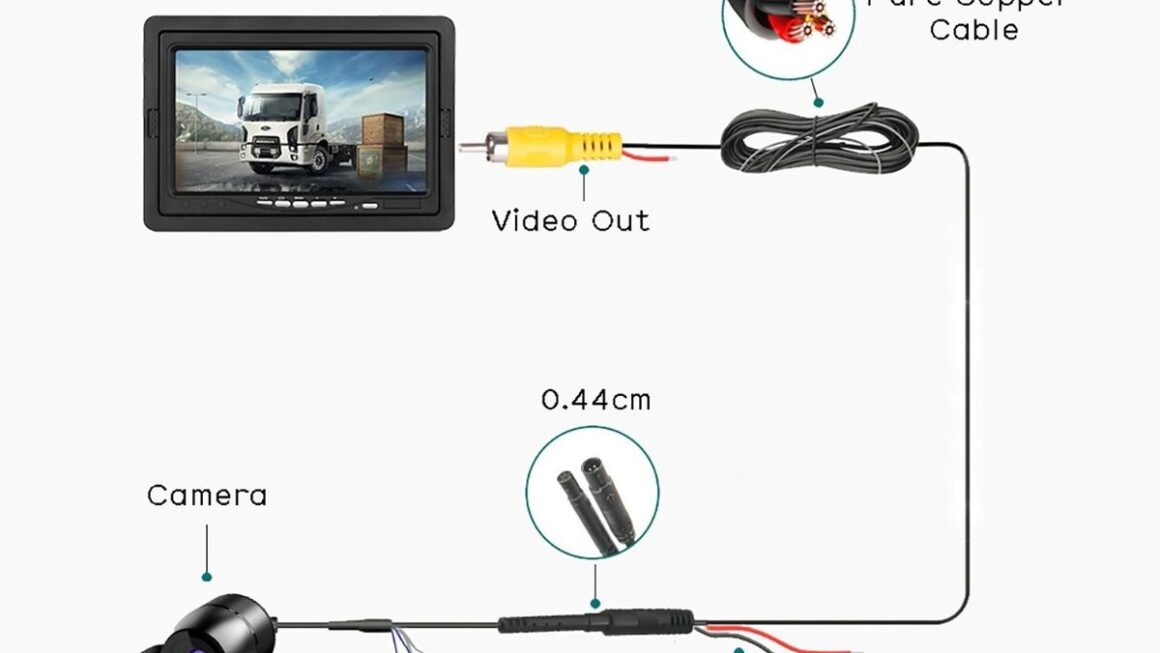
Are you looking for a Jensen Cr271Ml Wiring Diagram Cm701Mir? Look no further! In this article, we will provide you with all the information you need to wire your Jensen Cr271Ml like a pro.
Whether you’re a seasoned DIY enthusiast or just starting out, having the right wiring diagram is crucial to ensure a successful installation. With our easy-to-follow guide, you’ll be able to set up your Jensen Cr271Ml in no time.

Related Post Single Phase Motor Wiring Diagram With Capacitor Start Pdf
Next, carefully study the wiring diagram to familiarize yourself with the different components and their connections. Pay close attention to the color codes and labels to avoid any confusion during the installation process.
Once you have a clear understanding of the wiring diagram, start by disconnecting the power source to ensure your safety. Then, carefully connect each wire according to the diagram, making sure to secure them tightly to prevent any loose connections.
After you have completed the wiring process, double-check all the connections to ensure they are correct and secure. Once you’re confident that everything is in order, you can proceed to power up your Jensen Cr271Ml and enjoy your newly installed system.
In conclusion, wiring your Jensen Cr271Ml doesn’t have to be a daunting task. With the right tools, a clear wiring diagram, and a bit of patience, you’ll be able to set up your system like a pro. So roll up your sleeves, follow our guide, and get ready to enjoy some high-quality sound in no time!
Download and Print Jensen Cr271Ml Wiring Diagram Cm701Mir Listed below