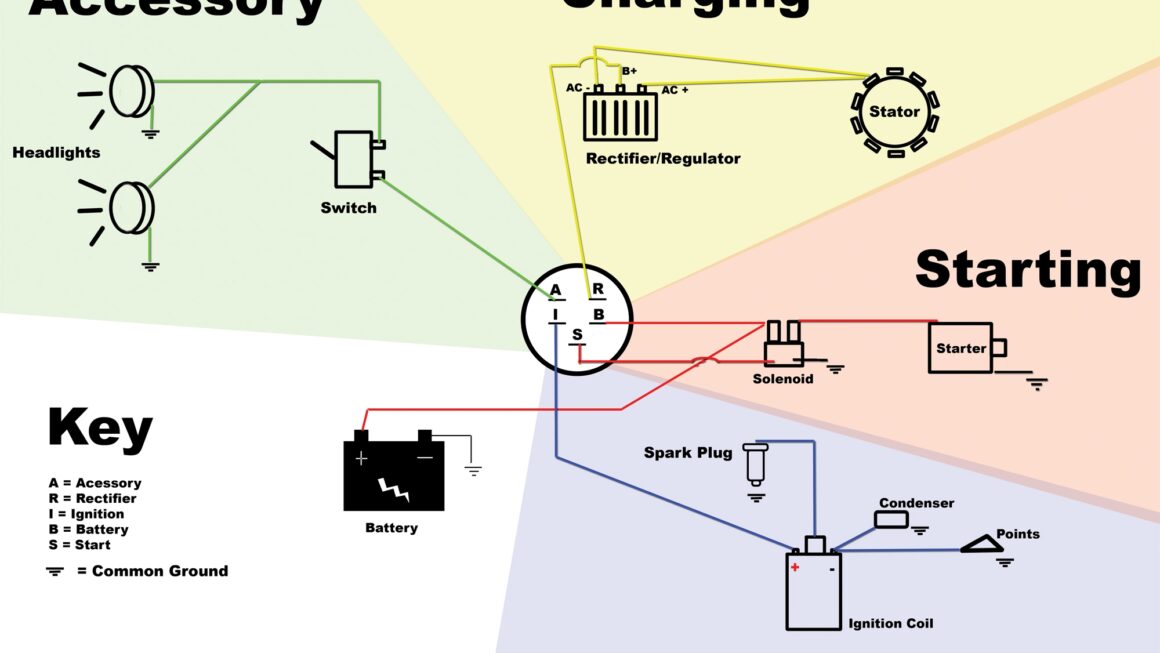
If you’re looking to understand how to wire up the ignition switch on your John Deere tractor, you’ve come to the right place. This article will guide you through the process in a simple and easy-to-follow manner.
Having a clear wiring diagram is essential when working on your John Deere ignition switch. It helps you identify the correct wires and connections, ensuring that everything is set up properly for smooth operation.

Related Post Jd 111 1983 Wiring Diagram
Start by disconnecting the battery to ensure your safety while working on the ignition switch. Then, refer to the wiring diagram to locate the ignition switch and identify the correct wires for each connection.
Carefully connect each wire to the corresponding terminal on the ignition switch, following the diagram closely. Double-check your connections to ensure everything is properly secured and insulated to prevent any short circuits.
Once you have completed the wiring process, reconnect the battery and test the ignition switch to make sure everything is working correctly. If you encounter any issues, refer back to the wiring diagram and troubleshoot accordingly.
In conclusion, understanding the wiring diagram for your John Deere ignition switch is crucial for proper installation and operation. By following the steps outlined in this article and paying attention to detail, you can confidently wire up your ignition switch with ease.
Download and Print John Deere Ignition Switch Wiring Diagram Listed below

Related Post Metra Line Out Converter Wiring Diagram