Looking to troubleshoot your John Deere Z425 ignition wiring diagram? You’ve come to the right place! Understanding how the wiring works is crucial for maintaining your lawn mower’s performance.
Whether you’re a seasoned DIY enthusiast or a beginner looking to learn more about your equipment, this guide will walk you through the process of deciphering and fixing any issues with your Z425’s ignition wiring.

Related Post Cub Cadet Ignition Switch Wiring Diagram
Start by locating the ignition switch and tracing the wires that connect to it. Check for any signs of wear or damage along the wiring harness. If you spot any issues, such as frayed wires or loose connections, it’s crucial to address them promptly to prevent further damage.
Next, use a multimeter to test the continuity of each wire in the ignition system. This will help you identify any faulty wires that may be causing issues with starting or running your Z425 mower. Be sure to follow the manufacturer’s instructions for using the multimeter correctly.
Once you’ve identified and fixed any issues with the wiring, double-check all connections to ensure they are secure. Reassemble any components you may have removed during the troubleshooting process and test the ignition system to verify that everything is working correctly.
In conclusion, understanding the John Deere Z425 ignition wiring diagram is essential for maintaining your lawn mower’s performance. By following the steps outlined in this guide, you can troubleshoot and fix any issues with the ignition system, ensuring that your Z425 continues to run smoothly for years to come.
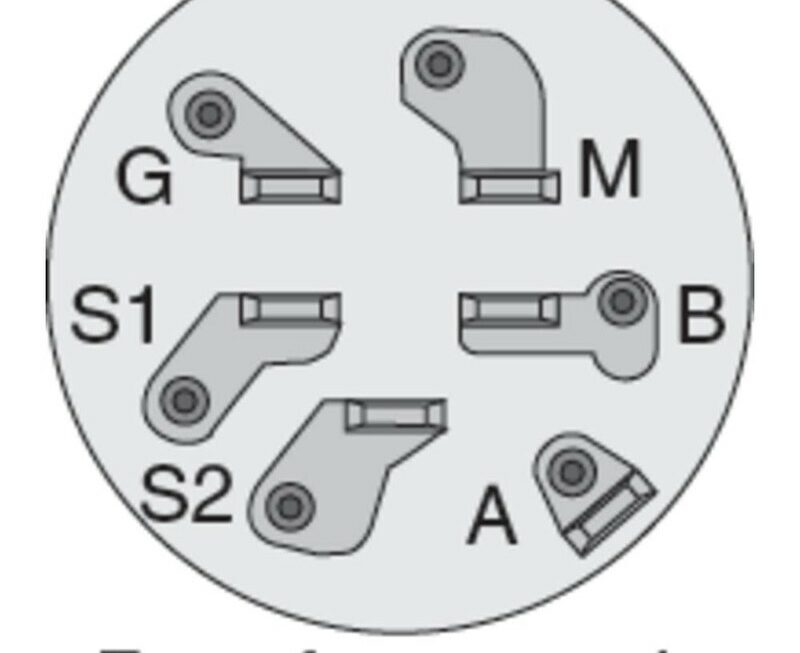
Download and Print John Deere Z425 Ignition Wiring Diagram Listed below

Related Post Lionel 0103 Electronic E Unit Wiring Diagram