If you’re looking to install Lenco trim tabs on your boat but feeling a bit overwhelmed by the wiring process, fear not! In this article, we’ll walk you through a simple Lenco trim tabs wiring diagram to make the installation process a breeze.
Trim tabs are a great addition to any boat, helping to improve stability, reduce bow rise, and increase overall performance on the water. With the right wiring diagram and a little know-how, you’ll have your trim tabs up and running in no time.

Related Post 5 Plug Trailer Wiring Diagram
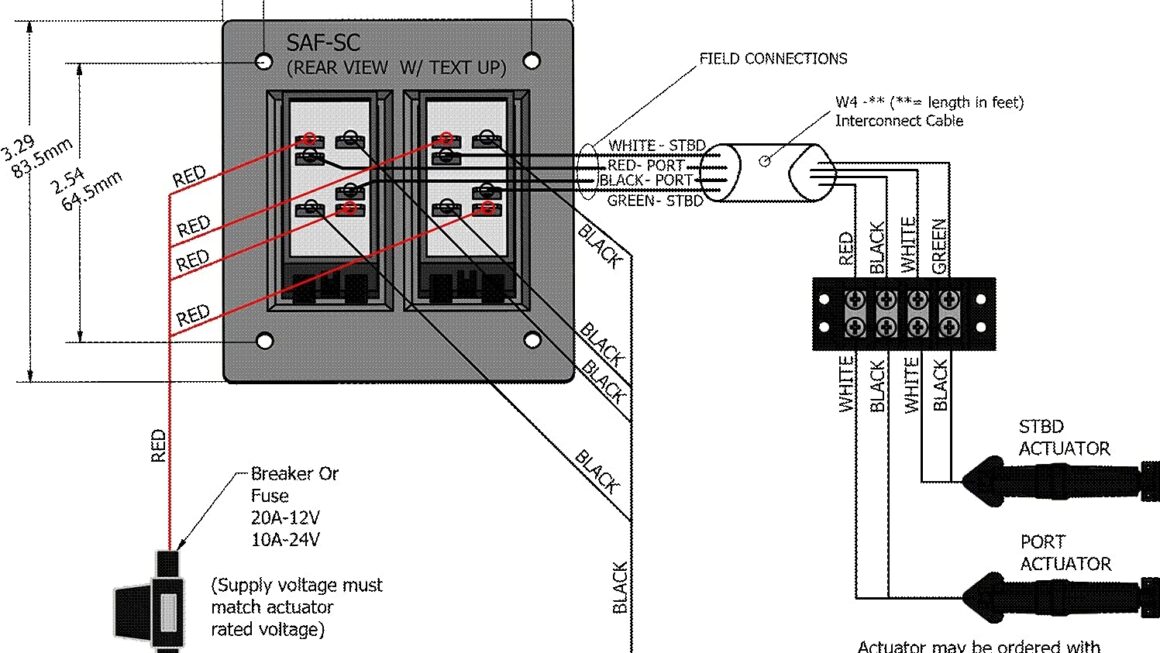
Start by carefully reading through the wiring diagram provided by Lenco. This diagram will outline the specific connections you need to make between the trim tab control switch, the power source, and the trim tab actuators. Take your time to understand the diagram before you begin any wiring.
Next, disconnect the power source to ensure safety during the installation process. Then, carefully route the wiring from the control switch to the trim tab actuators, making sure to secure the wiring away from any moving parts or sharp edges that could cause damage.
Once all the connections have been made according to the wiring diagram, double-check your work to ensure everything is secure and properly connected. Test the trim tabs to ensure they are functioning correctly before taking your boat out on the water.
With a little patience and attention to detail, installing Lenco trim tabs using a wiring diagram can be a straightforward process. Enjoy the improved performance and stability that trim tabs provide on your next boating adventure!
Download and Print Lenco Trim Tabs Wiring Diagram Listed below