Are you looking for a comprehensive guide on how to wire your Lennox HP26-030-12P HVAC system? Look no further! In this article, we will walk you through the process step by step, making it easy for you to get your system up and running in no time.
Understanding the wiring diagram for your Lennox HP26-030-12P is crucial to ensure that everything is connected correctly. By following the diagram carefully, you can avoid any potential issues and ensure that your system operates efficiently.

Related Post 200 Amp Meter Base Wiring Diagram
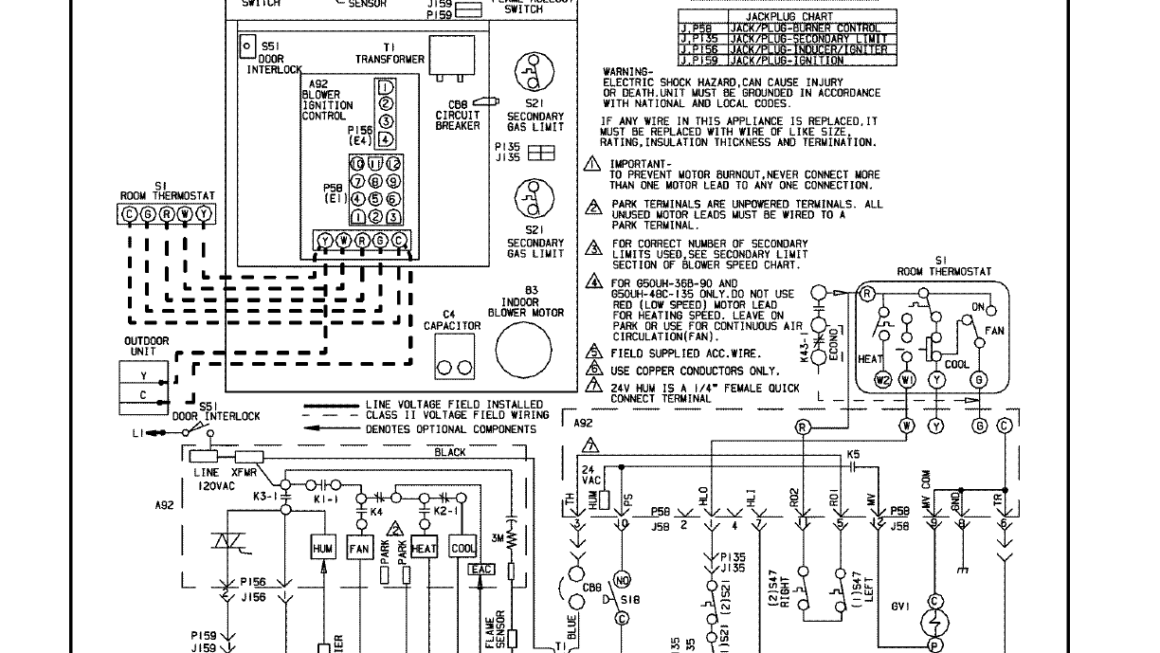
Lennox HP26-030-12P Wiring Diagram
The first step is to locate the wiring diagram for your specific model. This diagram will outline the connections for the various components of the system, including the thermostat, condenser, and air handler. Make sure to refer to this diagram throughout the installation process.
Next, you will need to gather the necessary tools and materials, including wire cutters, wire nuts, and electrical tape. It’s important to have everything on hand before you begin to avoid any delays in the installation process.
Once you have everything ready, you can start connecting the wires according to the diagram. Take your time and double-check each connection to ensure that everything is secure and properly aligned. This will help prevent any issues with the system down the line.
After all the wires are connected, it’s a good idea to test the system to make sure everything is working correctly. Turn on the power and monitor the system to ensure that it is heating or cooling as expected. If you encounter any issues, refer back to the wiring diagram to troubleshoot the problem.
In conclusion, wiring your Lennox HP26-030-12P HVAC system may seem daunting, but with the right information and a little patience, you can successfully complete the installation. By following the wiring diagram and taking your time with each connection, you can ensure that your system operates efficiently for years to come.
Download and Print Lennox Hp26-030-12P Wiring Diagram Listed below