Are you a guitar enthusiast looking to upgrade your Les Paul guitar? One popular modification that many players love is the Les Paul 50’s wiring diagram. This wiring scheme is known for its unique tone and vintage feel, making it a favorite among guitarists.
With the Les Paul 50’s wiring diagram, you can achieve a clearer and more dynamic sound compared to the modern wiring setup. This classic wiring method allows the volume and tone controls to interact in a different way, resulting in smoother and more gradual changes in tone.

Related Post 2008 Bmw 328Xi Dme Wiring Diagram
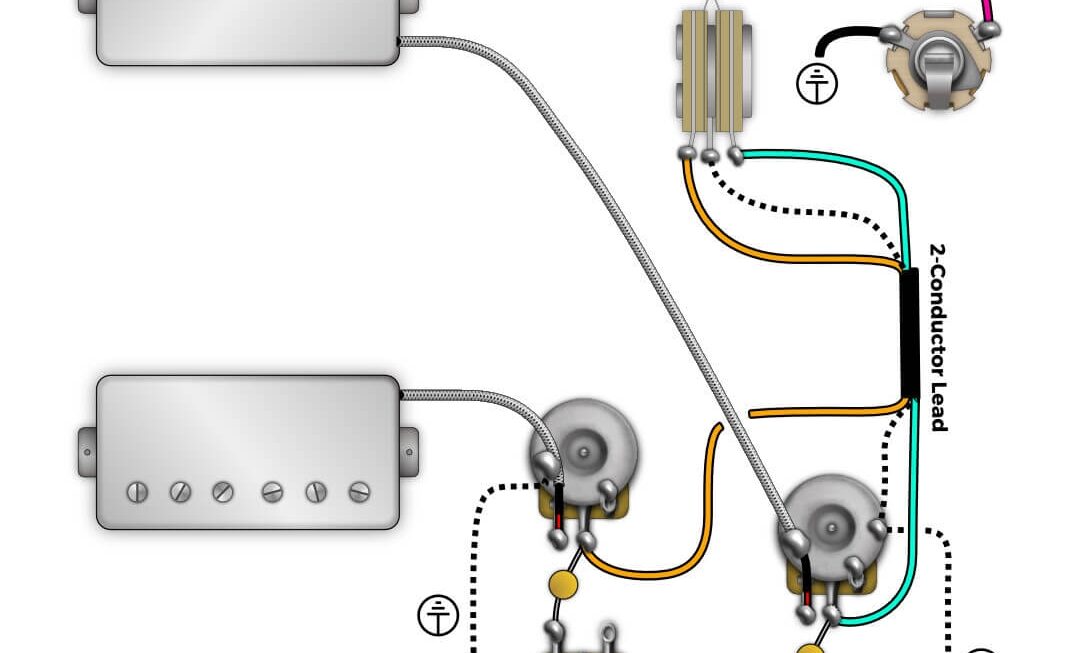
Les Paul 50’S Wiring Diagram
To implement the Les Paul 50’s wiring diagram on your guitar, you will need to rewire the electronics. This involves swapping the positions of the tone and volume pots, as well as changing the connections between the components. While it may sound daunting, many guitarists find the process to be a rewarding DIY project.
One of the main benefits of the Les Paul 50’s wiring diagram is the way it preserves the high-end frequencies when you lower the volume. This means that you can dial back the volume without losing clarity and brightness in your tone, making it perfect for achieving that classic rock sound.
Whether you’re a seasoned player looking to experiment with different tones or a beginner wanting to learn more about guitar electronics, the Les Paul 50’s wiring diagram is a great place to start. By understanding how this wiring setup works, you can unlock a world of sonic possibilities for your Les Paul guitar.
In conclusion, the Les Paul 50’s wiring diagram is a fantastic way to enhance the tone and versatility of your Les Paul guitar. By making a few simple modifications to the electronics, you can achieve a vintage sound that is sure to impress. Give it a try and see how this classic wiring scheme can take your playing to the next level!
Download and Print Les Paul 50’S Wiring Diagram Listed below