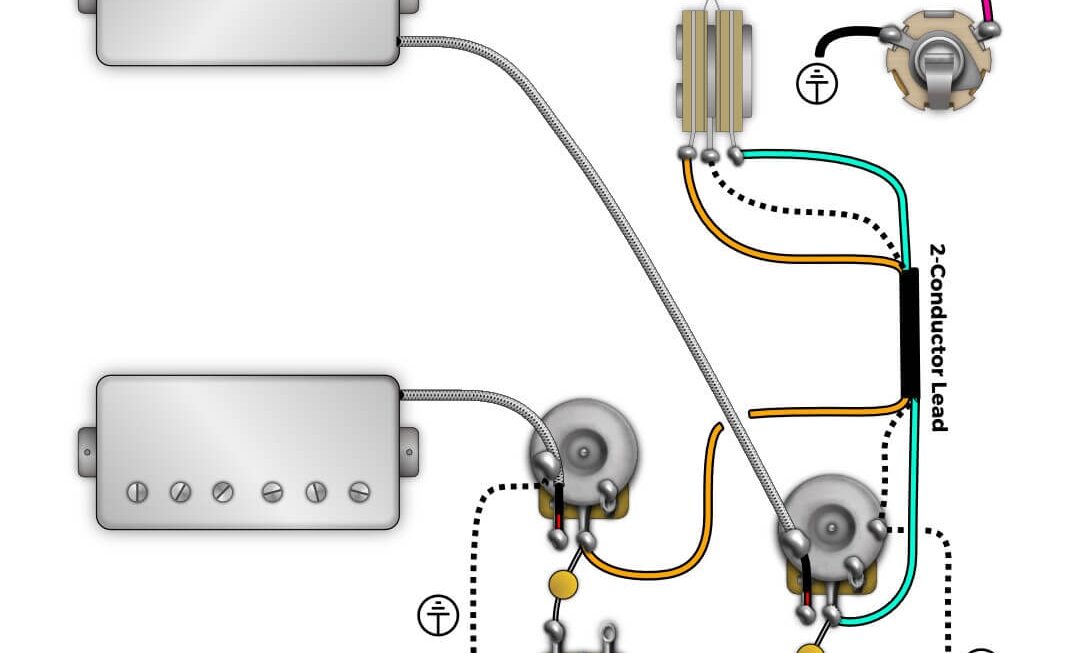
If you’re a guitar enthusiast looking to upgrade your Les Paul’s wiring, you’ve come to the right place. Understanding the Les Paul Wiring Diagram 50S can help you achieve that classic vintage tone you’ve been dreaming of.
By following this wiring diagram, you can easily modify your Les Paul’s electronics to replicate the iconic sound of the 1950s. Whether you’re a seasoned pro or a beginner, this guide will walk you through the process step by step.

Related Post Wiring Diagram Kawasaki Ignition Switch Bypass
By using high-quality components and following the diagram carefully, you can customize your Les Paul’s electronics to suit your playing style. Whether you prefer a clean, crisp sound or a gritty, distorted tone, this wiring diagram can help you achieve the sound you’re looking for.
Many guitarists swear by the Les Paul Wiring Diagram 50S, claiming that it has transformed their playing experience. By taking the time to understand and implement this diagram, you can unlock the full potential of your Les Paul and take your sound to the next level.
So, if you’re ready to dive into the world of vintage guitar tones and upgrade your Les Paul’s wiring, give the Les Paul Wiring Diagram 50S a try. You’ll be amazed at the difference it can make in your sound and playing experience.
Don’t wait any longer to unleash the true potential of your Les Paul. Follow the Les Paul Wiring Diagram 50S and start enjoying that classic vintage tone you’ve always wanted. Your guitar will thank you, and your audience will love the new sound you bring to the stage.
Download and Print Les Paul Wiring Diagram 50S Listed below