Are you looking to install a Leviton 2 way switch in your home but not sure where to start? Don’t worry, I’ve got you covered! In this article, I’ll walk you through a simple wiring diagram to help you get your new switch up and running in no time.
Leviton 2 way switches are a popular choice for homeowners looking to control lighting from multiple locations. Whether you want to turn your lights on and off from both ends of a hallway or from different levels of your home, a 2 way switch is the perfect solution.

Related Post John Deere 111 Moo111S242340 Wireing Diagram
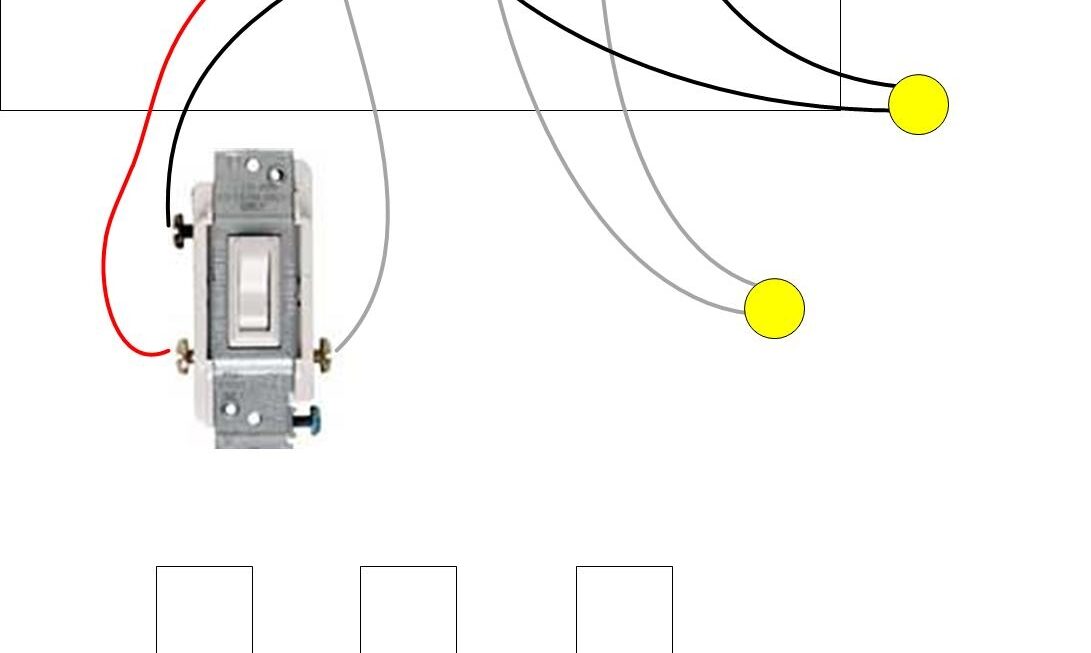
Next, connect the common terminal to the hot wire coming from your power source. This is usually a black wire. Then, connect one traveler terminal to the hot wire going to the light fixture, and the other traveler terminal to the neutral wire. Finally, connect the ground terminal to the ground wire.
Once you’ve made all the necessary connections, double-check your work to ensure everything is secure. After that, you can turn the power back on and test your new Leviton 2 way switch. If everything is working properly, congratulations! You’ve successfully installed your new switch.
Remember, if you ever need to troubleshoot or make changes to your wiring, always turn off the power before making any adjustments. Safety should always be your top priority when working with electrical systems.
Now that you have a better understanding of how to wire a Leviton 2 way switch, you can confidently tackle your next home improvement project. With the right tools and know-how, you’ll be a DIY pro in no time. Happy wiring!
Download and Print Leviton 2 Way Switch Wiring Diagram Listed below