Looking to install a Leviton 3-way lighted switch but not sure where to start? You’ve come to the right place! In this article, we’ll walk you through the wiring diagram for a Leviton 3-way lighted switch, making the installation process a breeze.
Before we dive into the wiring diagram, let’s first understand what a 3-way lighted switch is. A 3-way switch is commonly used in stairways, hallways, or large rooms where you want to control a single light fixture from multiple locations. The lighted feature on the switch indicates when the light is on, making it easy to locate in the dark.

Related Post Three Way Switch Wiring Diagram Pdf
To begin, turn off the power to the circuit at the breaker box to ensure your safety. Next, identify the common terminal on the switch and connect the power source wire to it. Then, connect the traveler wires to the remaining terminals on the switch. Finally, connect the other end of the traveler wires to the corresponding terminals on the light fixture.
Once you have completed the wiring connections, turn the power back on and test the switch to ensure it is functioning correctly. If the light turns on and off from both locations, congratulations – you have successfully installed a Leviton 3-way lighted switch!
Remember, safety always comes first when working with electrical wiring. If you are unsure or uncomfortable with any part of the installation process, don’t hesitate to contact a professional electrician for assistance.
Now that you have a better understanding of the Leviton 3-way lighted switch wiring diagram, you can confidently tackle your next lighting project. With the right tools and knowledge, you’ll be able to upgrade your home’s lighting system in no time!
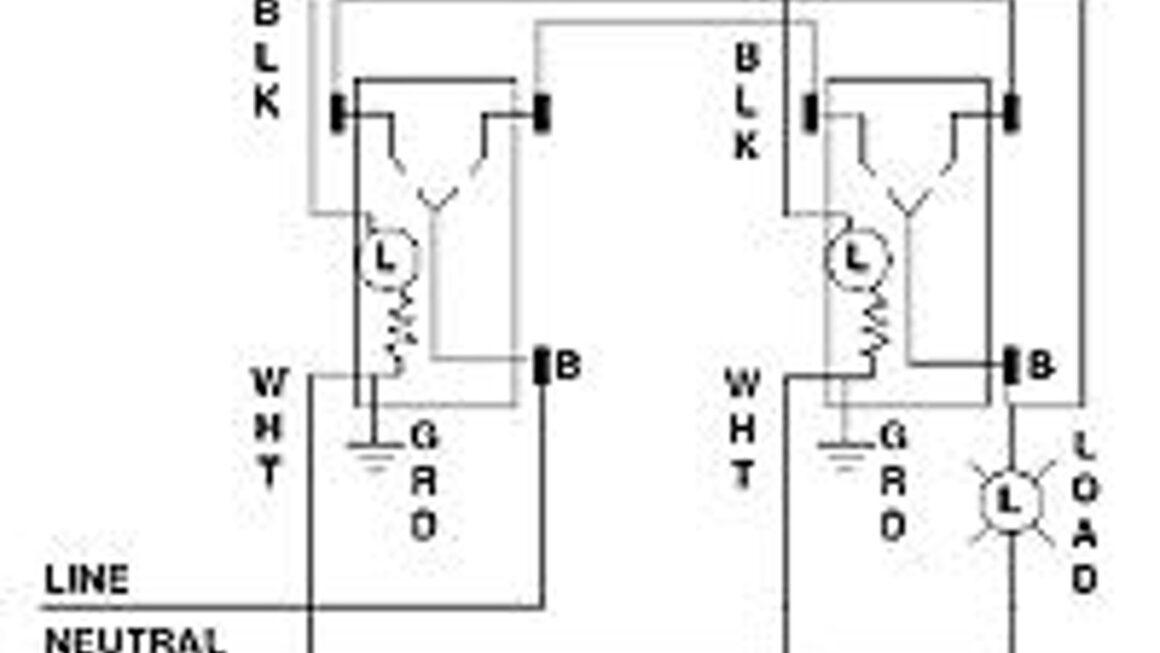
Download and Print Leviton 3 Way Lighted Switch Wiring Diagram Listed below