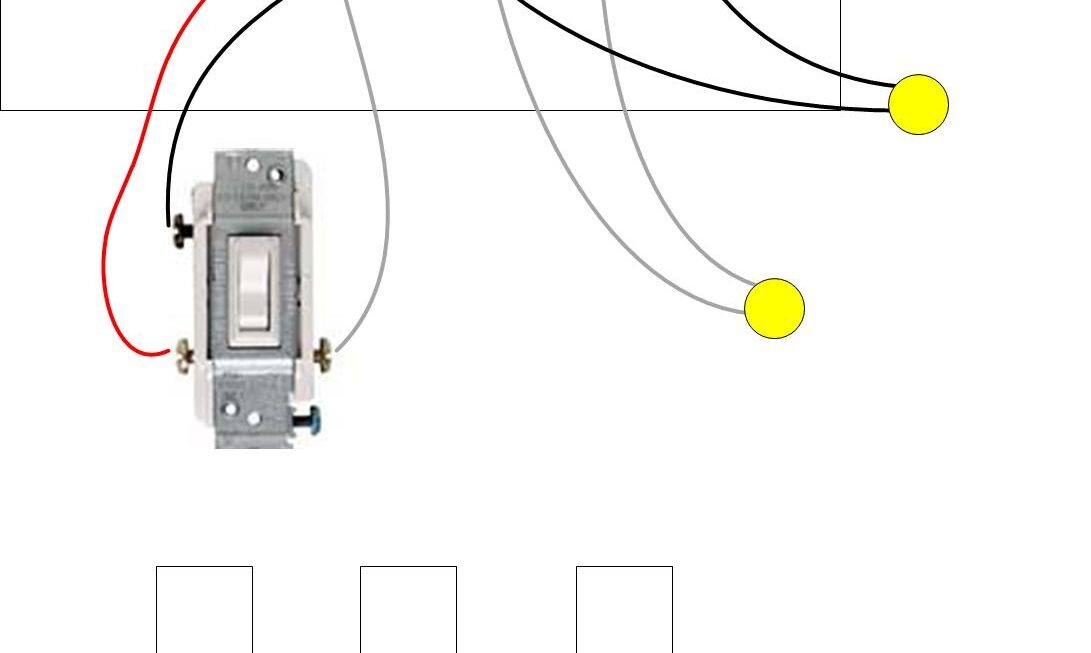
If you’re looking to install a new light switch in your home, understanding how to wire a Leviton 3-way switch is essential. Whether you’re a seasoned DIYer or a novice, this guide will walk you through the process step by step.
Leviton 3-way switches are commonly used in homes to control lights from two different locations. With the right wiring diagram and a few basic tools, you can easily install a 3-way switch in your home without the need for professional help.

Related Post Dual Battery System Wiring Diagram
Start by turning off the power to the circuit you’ll be working on at the breaker box. This step is crucial to ensure your safety throughout the installation process. Use a voltage tester to double-check that the power is off before proceeding.
Next, remove the existing switch from the wall and take note of the wire connections. You’ll typically see three wires – a hot wire, a traveler wire, and a ground wire. Disconnect the wires from the old switch and connect them to the corresponding terminals on the new Leviton 3-way switch.
Once all the wires are securely connected, carefully tuck them back into the electrical box and secure the switch in place. Turn the power back on at the breaker box and test the switch to ensure it’s working correctly. If everything is functioning as it should, you’ve successfully wired a Leviton 3-way switch!
With this simple guide, you can confidently tackle the installation of a Leviton 3-way switch in your home. Remember to always prioritize safety and follow the manufacturer’s instructions carefully. Enjoy the convenience of controlling your lights from multiple locations with ease!
Download and Print Leviton 3 Way Switch Wiring Diagrams Listed below