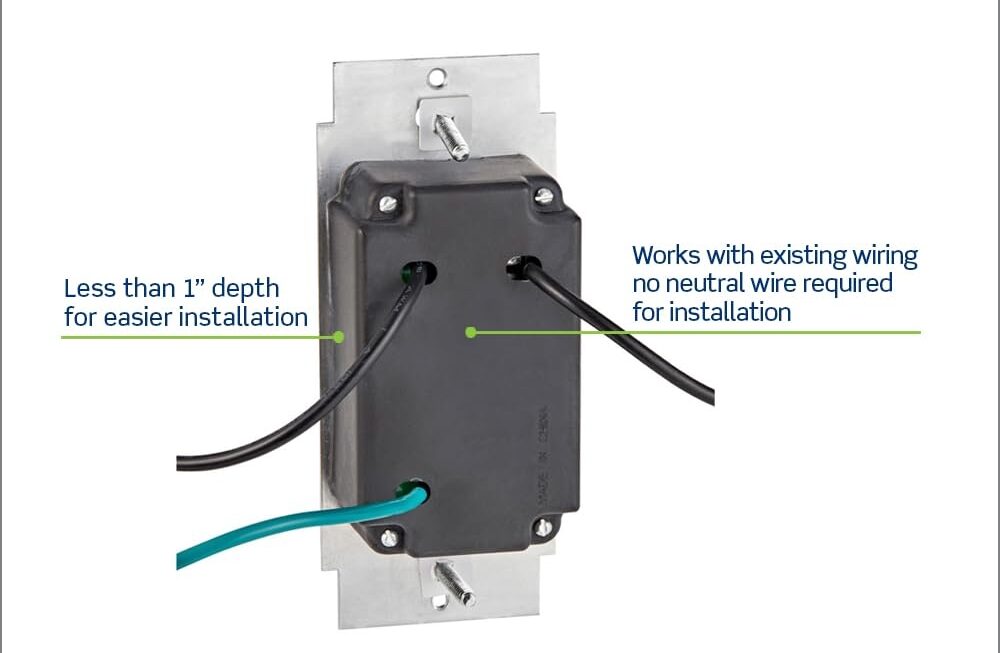
If you’re looking to install a Leviton dimmer switch in your home, you’ve come to the right place. These switches are a great way to control the lighting in any room and create the perfect ambiance for any occasion. In this article, we’ll walk you through the wiring process step by step.
Before we get started, it’s important to gather all the necessary tools and materials. You’ll need a Leviton dimmer switch, a screwdriver, wire nuts, electrical tape, and a voltage tester. Make sure to turn off the power to the circuit you’ll be working on before beginning any work.

Related Post Pdite Smrtvue Ch Wiring Diagram
Next, locate the neutral wire in the box, which is usually white. Connect this wire to the silver screw on the dimmer switch. If there is a ground wire present, connect it to the green screw on the switch. Make sure all connections are secure and insulated with electrical tape.
Once all the wires are connected, carefully tuck them back into the switch box and secure the dimmer switch in place using the screws provided. Turn the power back on and test the switch to ensure it is working properly. If everything is functioning as it should, you’re all set!
Installing a Leviton dimmer switch is a simple and straightforward process that can be completed in just a few easy steps. With the right tools and a little know-how, you can upgrade the lighting in your home and create the perfect atmosphere for any occasion.
So there you have it – a quick and easy guide to wiring a Leviton dimmer switch. Whether you’re a seasoned DIYer or a first-time homeowner, this project is sure to brighten up your space and enhance your home’s functionality. Give it a try and see the difference for yourself!
Download and Print Leviton Dimmer Switch Wiring Diagram Listed below