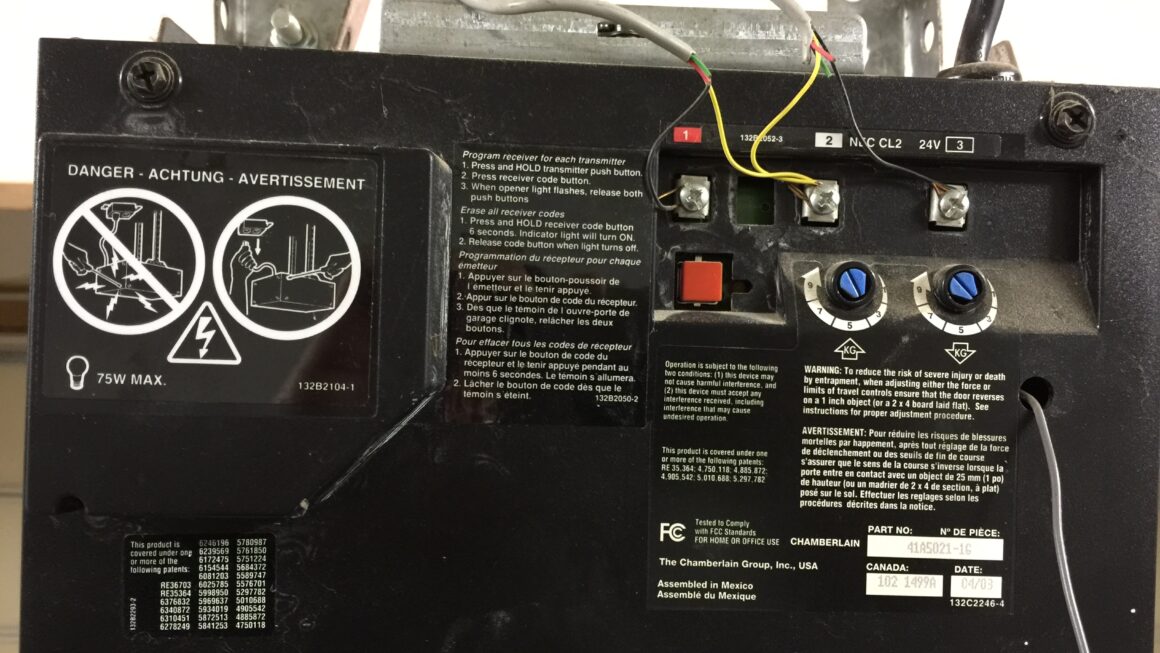
If you’re looking to install a Liftmaster garage door opener, understanding the wiring diagram is essential for a successful installation. The wiring diagram will guide you on how to connect the various components of the opener correctly.
Before starting the installation process, make sure to review the wiring diagram thoroughly to avoid any mistakes. It’s crucial to follow the diagram step by step to ensure that the opener functions properly and safely.

Related Post Three Way Switch With Dimmer Wiring Diagram
It’s important to use the correct gauge of wire and ensure that all connections are secure to prevent any issues with the opener later on. Following the wiring diagram accurately will help prevent any electrical problems down the line.
If you’re unsure about any part of the wiring diagram or how to make a specific connection, it’s always best to consult a professional. They can offer guidance and ensure that the installation is done correctly and safely.
Once you have successfully wired the Liftmaster garage door opener according to the diagram, test the opener to make sure it’s functioning correctly. Check all the functions, including opening and closing the door, to ensure everything is working as it should.
In conclusion, understanding and following the Liftmaster garage door opener wiring diagram is crucial for a successful installation. By taking the time to review the diagram and make the correct connections, you can enjoy a fully functional and safe garage door opener for years to come.
Download and Print Liftmaster Garage Door Opener Wiring Diagram Listed below