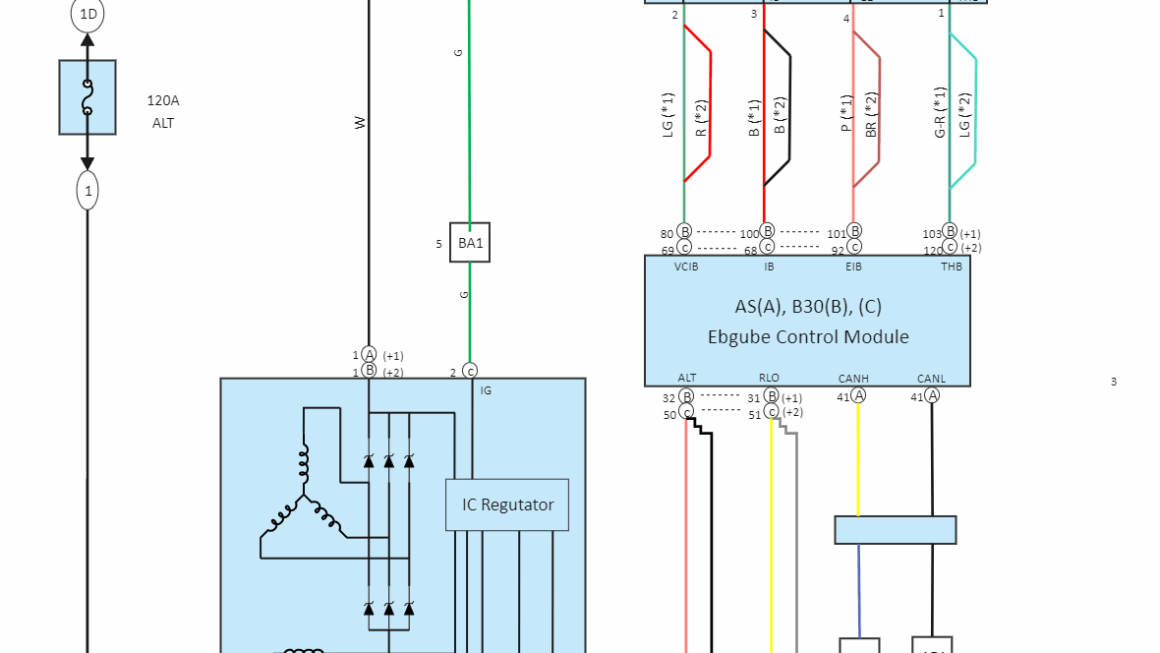
If you’re looking for a reliable and efficient way to wire your LM7 4 pin to 1 cable alternator, you’ve come to the right place. Understanding the wiring diagram is crucial to ensure everything is connected properly.
With the right guidance and a clear diagram, you can easily set up your LM7 4 pin to 1 cable alternator without any hassle. Let’s dive into the details of how to wire it correctly for optimal performance.

Related Post Wiring Diagram For A 7 Pin Plug
Start by connecting the main power cable from the alternator to the battery positive terminal. This will ensure a direct flow of power from the alternator to the battery, keeping your vehicle running smoothly.
Next, connect the field wire to the voltage regulator to regulate the output of the alternator. This step is crucial for maintaining a consistent voltage level and preventing any power surges that could damage your vehicle’s electrical system.
Finally, connect the sense wire to the battery positive terminal to provide feedback to the alternator about the battery’s voltage level. This information helps the alternator adjust its output to meet the battery’s needs, ensuring optimal performance and longevity.
By following these simple steps and referring to the LM7 4 pin to 1 cable alternator wiring diagram, you can easily set up your alternator with confidence. Proper wiring is key to ensuring your vehicle’s electrical system functions smoothly and efficiently.
In conclusion, understanding the LM7 4 pin to 1 cable alternator wiring diagram is essential for proper installation and optimal performance. By following the steps outlined above and referring to the diagram, you can easily wire your alternator without any issues. Remember to double-check your connections and seek professional help if needed to ensure everything is set up correctly. With the right knowledge and guidance, you’ll have your LM7 alternator up and running in no time!
Download and Print Lm7 4 Pin To 1 Cable Alternator Wiring Diagram Listed below