Thinking about installing low voltage landscape lighting in your yard? It’s a great way to enhance the beauty and safety of your outdoor space. But before you get started, it’s important to understand the wiring diagram to ensure everything is installed correctly.
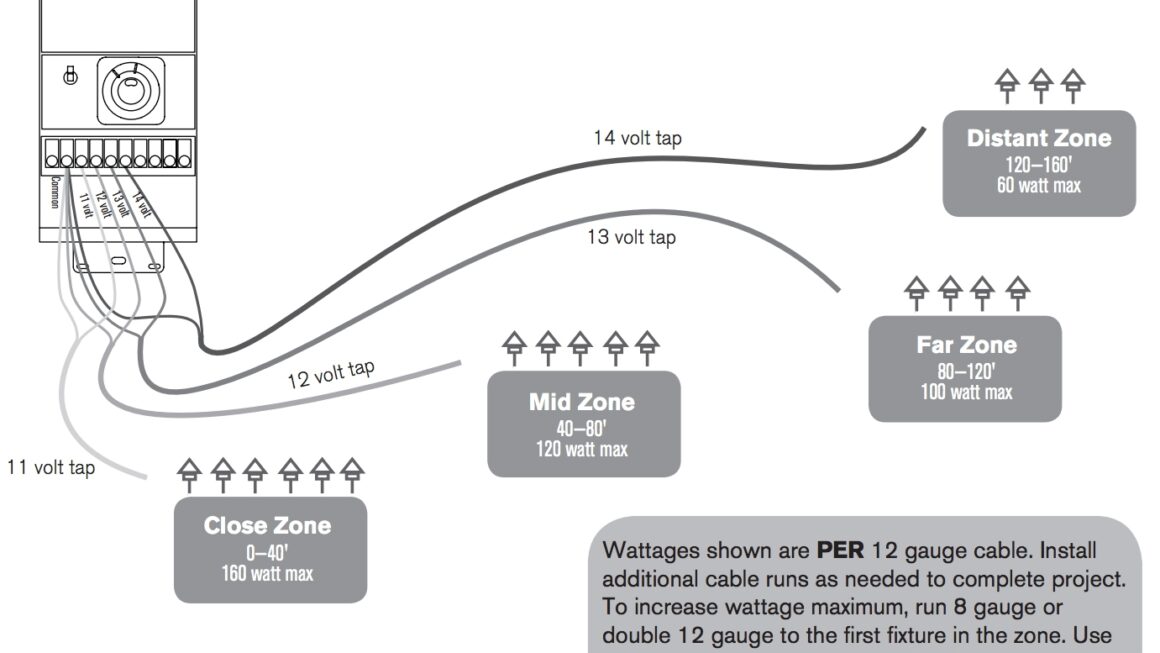
Low voltage landscape lighting wiring diagram is a crucial element in the installation process. It provides a visual guide on how to connect the various components of your lighting system, such as the transformer, cables, and fixtures. By following the diagram, you can avoid potential hazards and ensure that your lights work properly.

Related Post 1979 Chevy Camaro Starter Wiring Diagram Pdf
Next, run the low voltage cable from the transformer to each fixture location. Be sure to bury the cable at least 6 inches underground to protect it from damage. Then, connect the cables to the fixtures according to the wiring diagram, making sure to match the positive and negative wires correctly.
After all the connections are made, it’s time to test your lighting system. Turn on the power and check each fixture to ensure they are working properly. Make any necessary adjustments to the wiring or positioning of the fixtures to achieve the desired lighting effect.
Once everything is set up and working correctly, you can sit back and enjoy your beautifully illuminated outdoor space. Low voltage landscape lighting not only adds ambiance to your yard but also increases safety by illuminating pathways and potential hazards. With the right wiring diagram and proper installation, you can create a stunning outdoor environment for years to come.
In conclusion, understanding the low voltage landscape lighting wiring diagram is essential for a successful installation. By following the diagram and taking the necessary precautions, you can create a well-lit and safe outdoor space that you can enjoy day and night. So go ahead, get creative with your lighting design and transform your yard into a welcoming oasis.
Download and Print Low Voltage Landscape Lighting Wiring Diagram Listed below