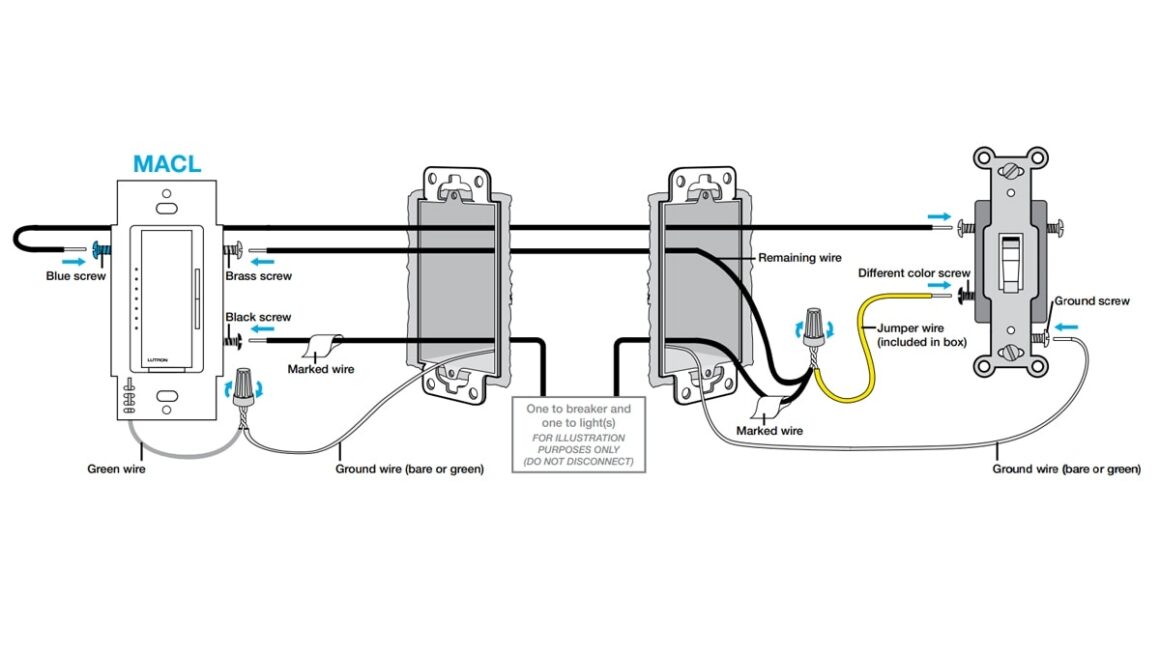
If you’re looking to install a Lutron 3-way switch in your home, you’ve come to the right place! These switches are a great way to control your lights from multiple locations, providing convenience and flexibility.
Before you get started with the installation process, it’s important to have a clear understanding of the wiring diagram. This will ensure that everything is connected correctly and that your switch functions properly.

Related Post Wiring Diagram For A Western Snow Plow
Next, you’ll need to connect the ground wire to the green screw on the switch. This wire is typically bare or green in color and provides a safe path for electrical current in case of a fault.
Once all the wires are connected, you can secure the switch in place and test it to ensure that it’s working correctly. If everything is functioning as it should, you can finish up by installing the switch plate cover.
It’s important to follow the wiring diagram carefully and turn off the power to the circuit before you begin. If you’re unsure about any part of the installation process, it’s always best to consult a professional electrician for assistance.
With the Lutron 3-way switch properly installed, you’ll be able to control your lights with ease from multiple locations in your home. Say goodbye to fumbling for the light switch in the dark – with Lutron, convenience is just a click away!
Download and Print Lutron 3-Way Switch Wiring Diagram Listed below