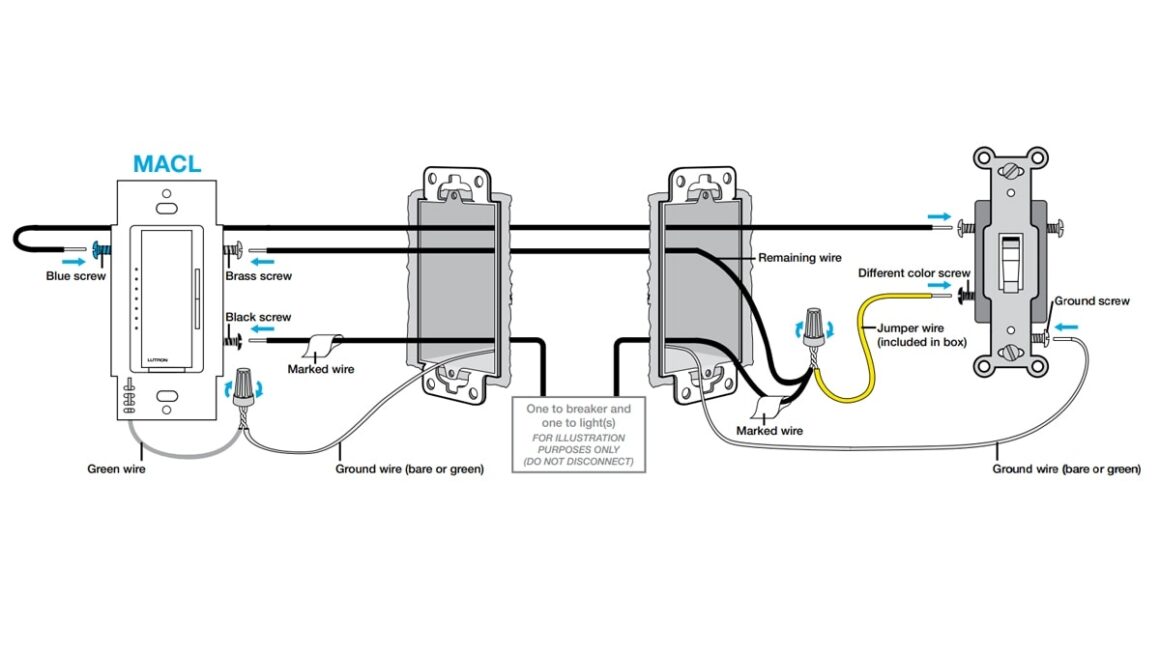
Are you looking for a Lutron dimmer wiring diagram for a 3-way switch setup? You’re in the right place! Installing a dimmer switch can add ambiance and save energy in your home. It’s a simple DIY project that can make a big difference in your space.
Before diving into the wiring process, it’s important to gather the necessary tools and materials. You’ll need a Lutron dimmer switch, screwdriver, wire stripper, and electrical tape. Make sure to turn off the power to the circuit before starting any work to stay safe.

Related Post 2-Wire Phone Jack Wiring Diagram
Next, connect the two traveler wires from the existing 3-way switch setup to the brass screws on the dimmer switch. Make sure to follow the wiring diagram provided by Lutron for your specific model. Once all the connections are secure, carefully tuck the wires back into the electrical box.
After securing the dimmer switch in place, turn the power back on and test the dimmer function. You should now be able to control the light fixture with both switches and adjust the brightness using the dimmer switch. Enjoy the new ambiance and energy savings in your space!
Remember, if you’re ever unsure about any electrical work, it’s best to consult a professional electrician. Safety should always be the top priority when working with electricity. With the right tools, materials, and know-how, installing a Lutron dimmer switch for a 3-way switch setup can be a simple and rewarding project.
Now that you have your Lutron dimmer wiring diagram for a 3-way switch setup, you’re ready to enhance the lighting in your home. Whether you’re looking to create a cozy atmosphere in the living room or improve visibility in the kitchen, a dimmer switch can help you achieve your lighting goals. Happy wiring!
Download and Print Lutron Dimmer Wiring Diagram 3-Way Listed below