If you’re looking to upgrade your home lighting system, the Lutron Maestro 3 Way Dimmer is a great option to consider. With its sleek design and advanced features, this dimmer switch can help you create the perfect ambiance in any room.
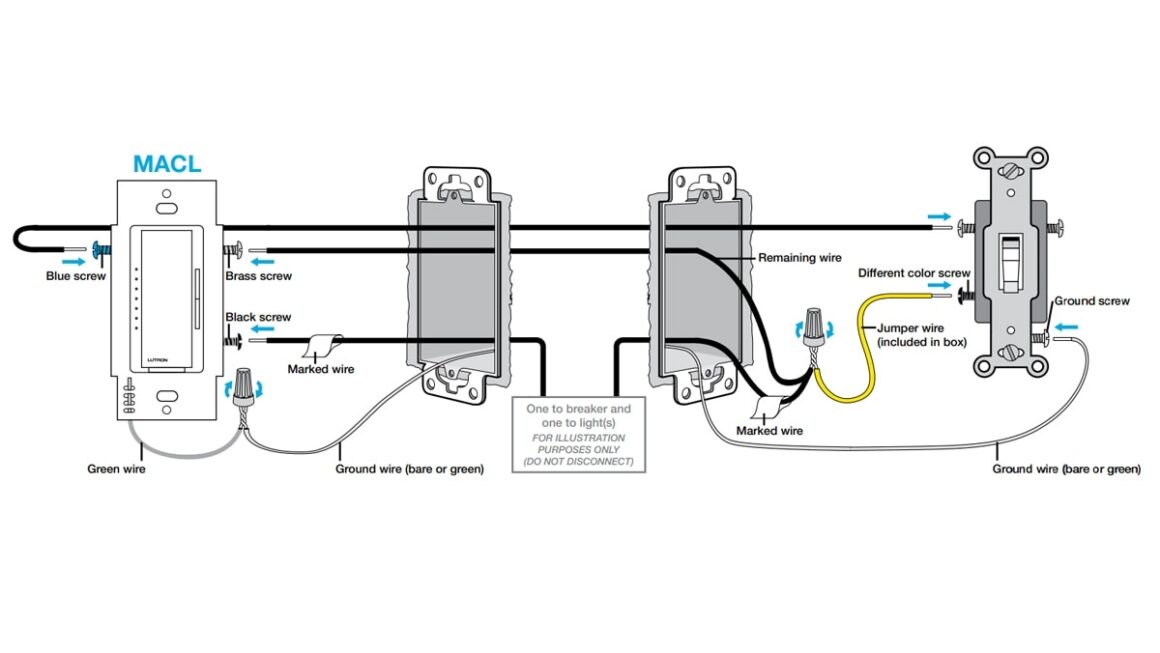
Installing a Lutron Maestro 3 Way Dimmer may seem daunting at first, but with the right wiring diagram and a little know-how, you can easily do it yourself. In this article, we’ll walk you through the steps to wire your dimmer switch correctly.

Related Post Wiring Diagram For Pressure Switch
Start by identifying the wires in your existing switch box. You should see a hot wire, a load wire, and a neutral wire. Once you’ve located these wires, follow the wiring diagram provided by Lutron to connect the dimmer switch correctly.
Typically, you’ll need to connect the hot wire to the black screw on the dimmer switch, the load wire to the red screw, and the neutral wire to the silver screw. Make sure to secure the wires tightly to ensure a safe and reliable connection.
After you’ve wired the dimmer switch, turn the power back on and test the dimming function to ensure everything is working properly. If you encounter any issues, double-check your wiring connections and consult the Lutron Maestro 3 Way Dimmer wiring diagram for guidance.
In conclusion, installing a Lutron Maestro 3 Way Dimmer is a simple and effective way to enhance your home lighting experience. With the right wiring diagram and a little patience, you can enjoy the benefits of dimmable lighting in no time.
Download and Print Lutron Maestro 3 Way Dimmer Wiring Diagram Listed below