Looking to install a Lutron wiring diagram for a 3-way dimmer switch in your home? You’ve come to the right place! In this article, we’ll walk you through the process of setting up your Lutron dimmer switch with ease.
With the Lutron wiring diagram for a 3-way dimmer, you can easily control the lighting in your home from multiple locations. Say goodbye to fumbling for the light switch in the dark – with this setup, you’ll have convenient access to your lights wherever you are.

Related Post Carrier Heat Pump Wiring Diagram
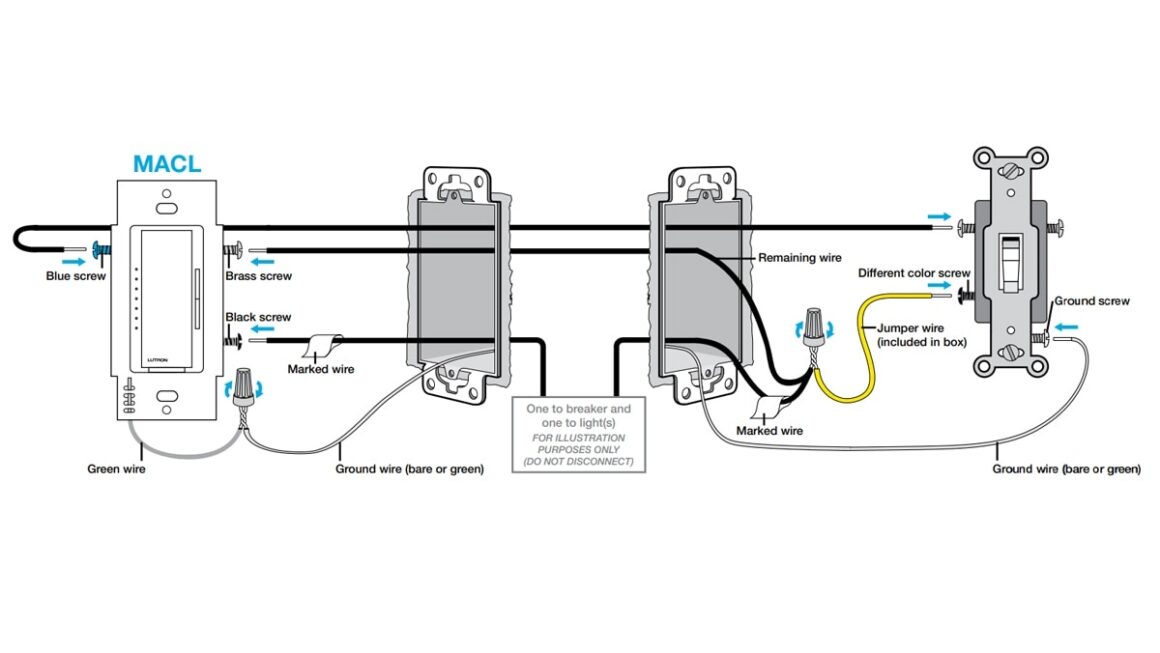
Start by identifying the common wire, traveler wires, and ground wire in your existing switch setup. Then, follow the Lutron wiring diagram to match the wires to the corresponding terminals on the dimmer switch. It’s important to make sure each wire is securely connected to the correct terminal to ensure proper functionality.
After connecting the wires according to the Lutron wiring diagram, carefully tuck everything back into the electrical box and secure the dimmer switch in place. Once everything is back in order, you can restore power to the circuit and test out your new dimmer switch. Enjoy the convenience and ambiance of adjustable lighting in your home!
Remember, if you’re ever unsure about any step in the installation process, don’t hesitate to consult a professional electrician. Safety is key when working with electrical wiring, so it’s always better to be safe than sorry. With the right guidance and precautions, you’ll have your Lutron 3-way dimmer switch up and running in no time.
In conclusion, installing a Lutron wiring diagram for a 3-way dimmer switch is a straightforward process that can enhance the functionality and aesthetics of your home lighting. With the right tools and knowledge, you can easily upgrade your lighting control system and enjoy the benefits of adjustable lighting at your fingertips.
Download and Print Lutron Wiring Diagram 3 Way Dimmer Listed below