If you’re looking to understand how to wire a motor starter in a 3-phase system, you’ve come to the right place. Wiring a motor starter may seem intimidating at first, but with the right guidance, you’ll be able to tackle it with confidence.
Motor starters are crucial components in industrial settings, responsible for starting and stopping motors safely. Understanding how to wire them correctly is essential to ensure the smooth operation of your machinery.

Related Post Wiring Diagram For Three Phase Motor
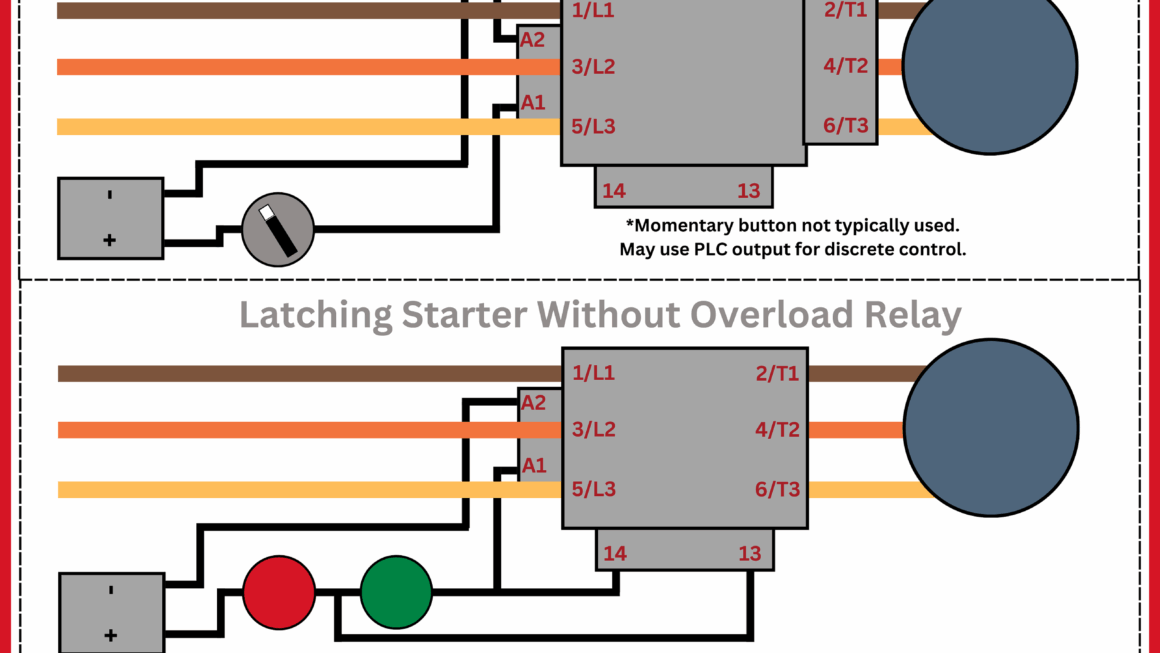
Start by identifying the main power supply wires – typically L1, L2, and L3 – and connecting them to the corresponding terminals on the motor starter. Next, connect the control circuit wires, including the start and stop buttons, to the appropriate terminals.
Once the main power and control circuit connections are in place, you can then connect the motor leads to the motor starter. Make sure to follow the manufacturer’s instructions and double-check all connections before powering up the system.
By following a clear wiring diagram and taking the time to understand the connections, you can ensure that your motor starter operates safely and efficiently. Don’t hesitate to seek help from a professional if you’re unsure about any step in the process.
In conclusion, wiring a motor starter in a 3-phase system may seem daunting at first, but with the right knowledge and guidance, you can tackle the task with ease. Remember to follow a clear wiring diagram, double-check all connections, and seek help if needed to ensure the smooth operation of your machinery.
Download and Print Motor Starter Wiring Diagram 3 Phase Listed below