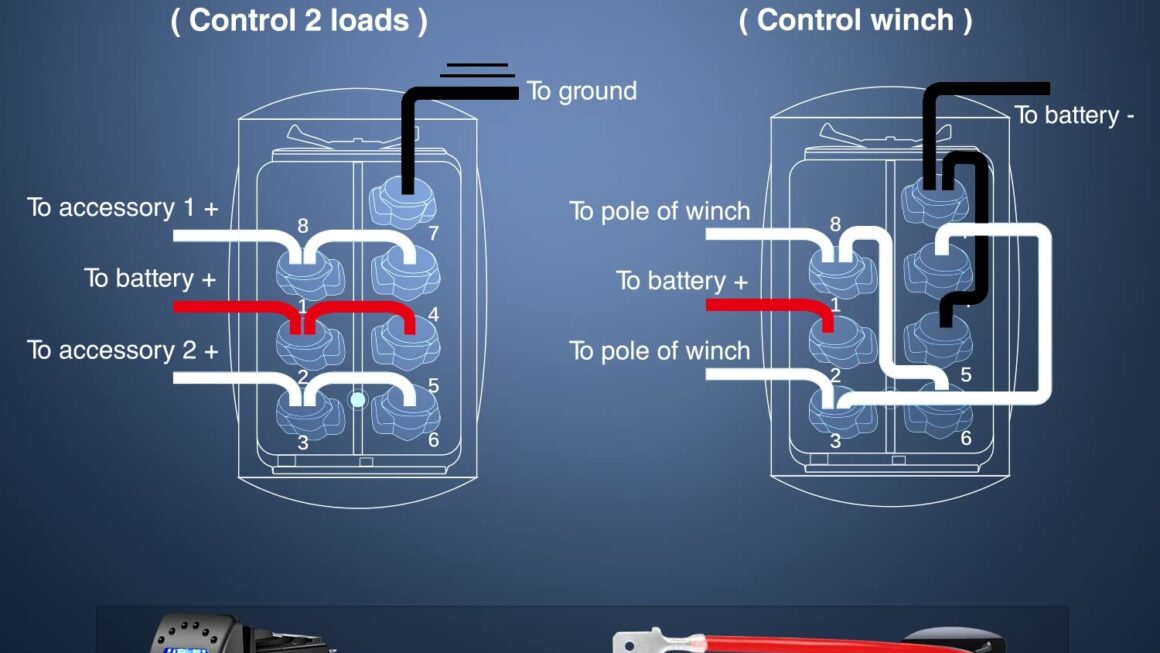
If you’re looking to install a Nilight 5 pin rocker switch in your vehicle or boat, you may be wondering how to wire it up properly. Understanding the wiring diagram is crucial to ensure that the switch functions correctly and safely.
In this article, we will walk you through the process of wiring a Nilight 5 pin rocker switch step by step, so you can easily follow along and complete the installation with confidence.

Related Post Air Conditioner Contactor Wiring Diagram
The first step is to identify the pins on the switch and determine their functions. Typically, a Nilight 5 pin rocker switch will have pins labeled as power, accessories, ground, and two additional pins for the LED light indicator.
Once you have identified the pins and their functions, you can start wiring the switch according to the diagram. Make sure to connect the power and ground wires correctly to ensure the switch operates as intended.
After completing the wiring process, test the switch to ensure that it functions properly. You can do this by turning the switch on and off and checking if the connected accessories respond accordingly.
By following the Nilight 5 pin rocker switch wiring diagram and these simple steps, you can easily install the switch in your vehicle or boat without any hassle. Now you can enjoy the convenience and functionality that this switch has to offer.
With this guide, you should now have a better understanding of how to wire a Nilight 5 pin rocker switch. Remember to always refer to the wiring diagram and follow the instructions carefully to ensure a safe and successful installation.
Download and Print Nilight 5 Pin Rocker Switch Wiring Diagram Listed below

Related Post 3 Way Switch Wiring Diagram Power At Light