If you’re looking to install a Nilight rocker switch in your vehicle, you’ve come to the right place. Understanding the wiring diagram is crucial for a successful installation.
Nilight rocker switches are a popular choice for controlling various accessories in your car or truck. These switches are durable, reliable, and easy to install, making them a favorite among DIY enthusiasts.

Related Post 7 Pin Rocker Switch Wiring Diagram
Typically, a Nilight rocker switch has three terminals: power, ground, and accessory. The power terminal is where you connect the positive (+) wire from your vehicle’s electrical system. The ground terminal is for the negative (-) wire, and the accessory terminal is for the wire that goes to the accessory you’re controlling.
It’s important to double-check the wiring diagram and make sure you have the correct wires connected to the right terminals. This will ensure that your switch functions properly and safely. If you’re unsure about anything, don’t hesitate to seek help from a professional or someone with experience in electrical work.
Once you’ve wired your Nilight rocker switch according to the diagram, double-check all connections and secure them properly. Test the switch to make sure it turns your accessory on and off as intended. If everything works correctly, you’re good to go!
In conclusion, understanding the Nilight rocker switch wiring diagram is essential for a successful installation. By following the diagram provided by the manufacturer and double-checking your connections, you can enjoy the convenience and functionality of your new switch in no time.
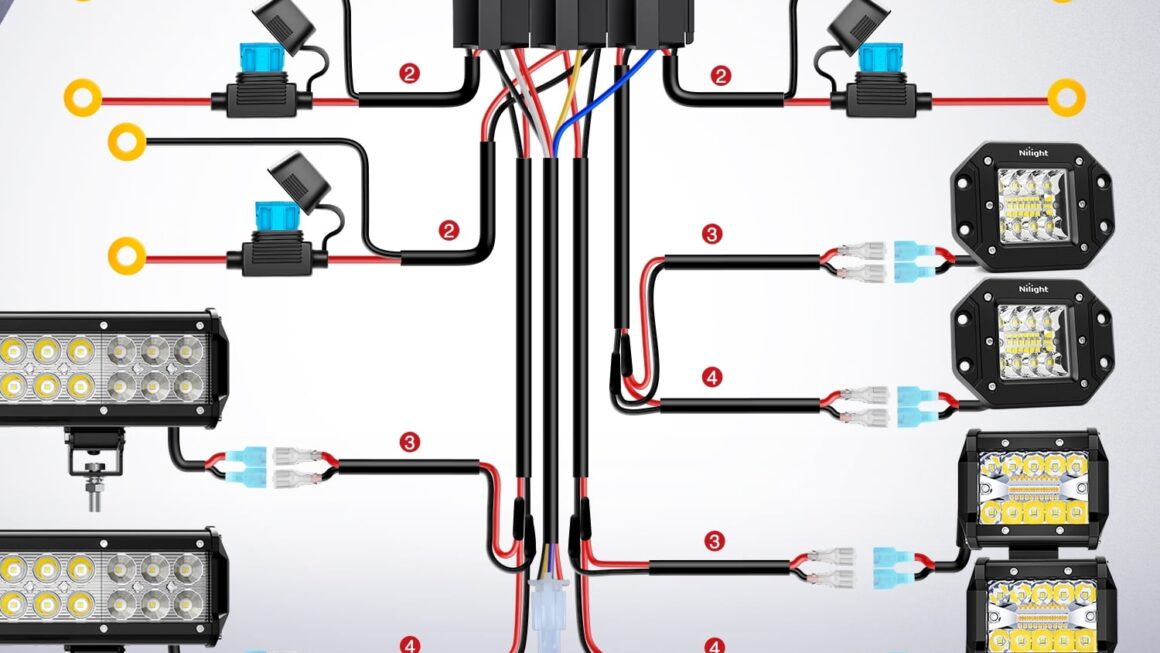
Download and Print Nilight Rocker Switch Wiring Diagram Listed below

Related Post Rv Air Conditioning Wiring Diagram