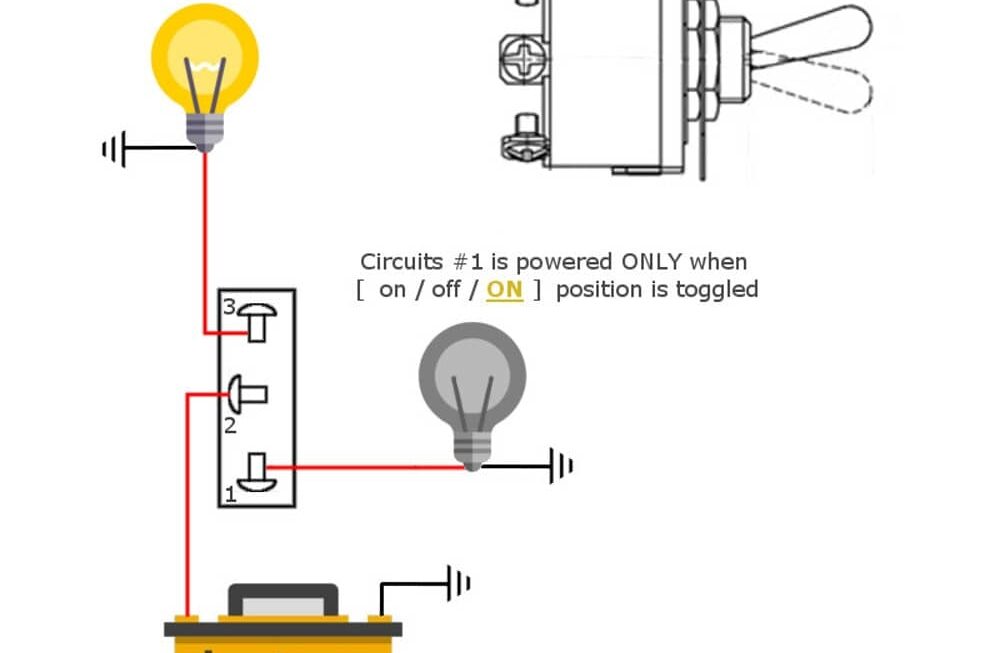
If you’re looking to install an on off switch for a new project or repair an existing one, having a wiring diagram can be a lifesaver. Understanding how to properly wire the switch can save you time and frustration in the long run.
With the right diagram, you can easily identify which wires go where and ensure that your switch operates correctly. Whether you’re a seasoned DIYer or just starting out, having a clear and concise wiring diagram is essential.

Related Post 3 Wire Motor Wiring Diagram
Next, carefully follow the diagram provided with your switch. Pay close attention to the color-coding of the wires and ensure they are connected to the correct terminals. Double-check your connections before turning on the power to avoid any potential hazards.
If you’re unsure about any part of the wiring process, don’t hesitate to seek help from a professional electrician. It’s always better to be safe than sorry when it comes to electrical work. By following the wiring diagram and taking the necessary precautions, you can successfully install an on off switch with confidence.
Remember, practice makes perfect when it comes to DIY projects. Don’t be afraid to make mistakes along the way – it’s all part of the learning process. With a bit of patience and perseverance, you’ll soon become an expert at wiring on off switches.
In conclusion, having a clear and detailed wiring diagram is crucial when installing an on off switch. By following the diagram carefully and taking the necessary safety precautions, you can ensure that your switch operates smoothly and safely. So roll up your sleeves, grab your tools, and get ready to tackle your next electrical project with confidence!
Download and Print On Off Switch Wiring Diagram Listed below