Looking to install a Pioneer DMH-160BT in your car but not sure how to wire it up? Don’t worry, we’ve got you covered with a detailed wiring diagram that will make the installation process a breeze.
The Pioneer DMH-160BT is a popular choice for car audio enthusiasts due to its advanced features and user-friendly interface. With the right wiring diagram, you can easily connect your new head unit to your car’s existing audio system.

Related Post 50 Amp Rv Plug Wiring Diagram
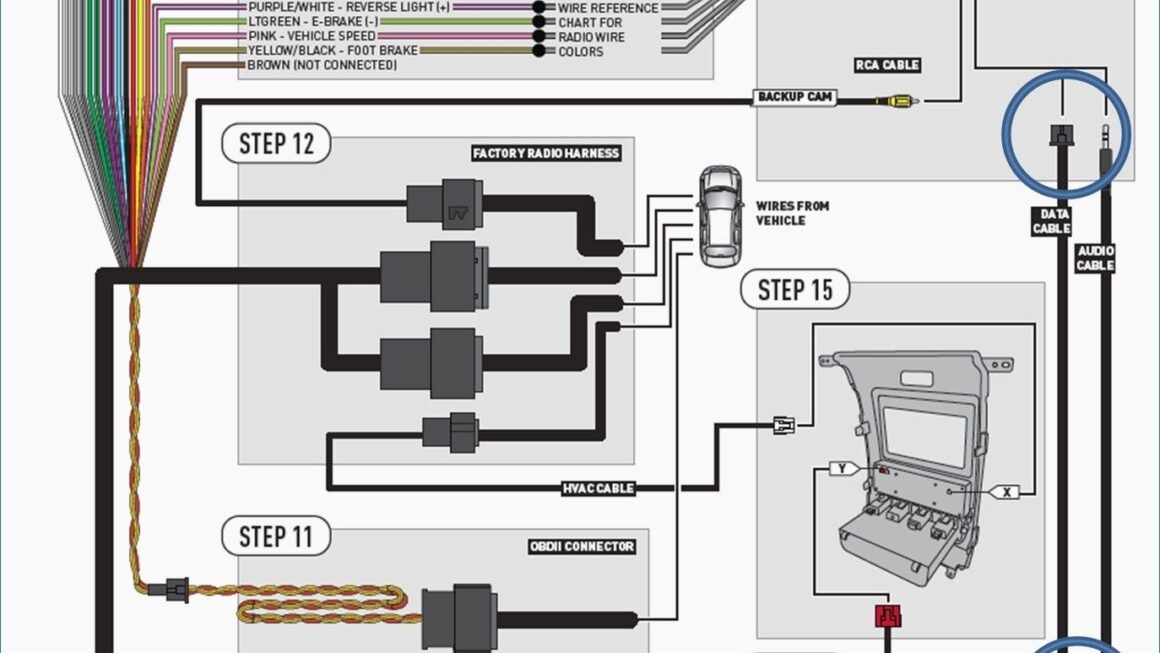
Start by locating the wiring harness that came with your Pioneer DMH-160BT. This harness will have color-coded wires that correspond to specific functions, such as power, ground, speaker connections, and more. Refer to the wiring diagram to ensure you’re connecting the right wires to the right components.
Once you’ve identified the correct wires, carefully strip the insulation off the ends and connect them to the corresponding terminals in your car. Make sure to secure the connections properly to prevent any issues with audio quality or functionality.
After you’ve completed the wiring process, double-check all connections to ensure everything is secure and properly connected. Once you’re confident that everything is in place, power up your Pioneer DMH-160BT and enjoy your new car audio system.
With the help of a detailed wiring diagram and some basic tools, you can easily install a Pioneer DMH-160BT in your car and enjoy high-quality audio on the go. Say goodbye to boring commutes and hello to a soundtrack that keeps you entertained wherever you go.
Don’t let the thought of wiring up a new car stereo intimidate you. With the right tools and guidance, you can tackle this project with confidence and upgrade your car audio system in no time. Happy listening!
Download and Print Pioneer Dmh-160Bt Wiring Diagram Listed below