Looking to upgrade your car audio system with a Rockford Fosgate amp but not sure how to wire it up? You’re in the right place! In this article, we’ll provide you with a detailed Rockford Fosgate amp wiring diagram to help you get the job done smoothly.
Rockford Fosgate is a well-known name in the car audio industry, renowned for their high-quality amps and speakers. By following our wiring diagram, you can ensure that your Rockford Fosgate amp is installed correctly, maximizing its performance and ensuring a great listening experience in your vehicle.

Related Post Boat Kill Switch Wiring Diagram
Next, connect the remote wire from the amp to the head unit of your car stereo. This wire will signal the amp to turn on when the stereo is powered up, allowing for seamless integration between the two components. Make sure to secure the connections with electrical tape or wire connectors.
Once the power and remote wires are in place, it’s time to connect the speaker wires. Run the speaker wire from the amp to each speaker, ensuring that the positive and negative terminals are correctly matched to avoid any sound distortion. Secure the connections with crimp connectors or solder for a reliable connection.
After all the wires are connected, double-check your connections to ensure everything is secure and properly wired. Turn on your car stereo and Rockford Fosgate amp to test the system and make any necessary adjustments for optimal sound quality. Enjoy your newly installed Rockford Fosgate amp and the enhanced audio experience it provides!
With our easy-to-follow Rockford Fosgate amp wiring diagram, you can confidently install your new amp and enjoy a premium audio experience in your vehicle. Follow the steps outlined in this guide to ensure a smooth and successful installation process, bringing your car audio system to the next level with Rockford Fosgate quality and performance.
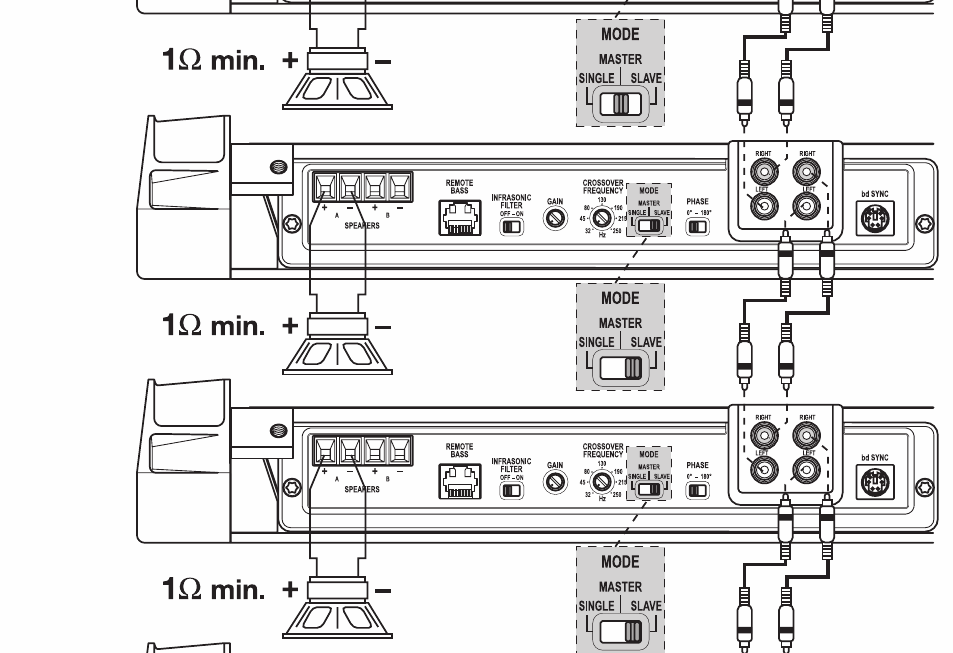
Download and Print Rockford Fosgate Amp Wiring Diagram Listed below