Looking to wire up your RV’s electrical system? Understanding how to correctly wire a 30 amp plug is crucial for ensuring your RV’s electrical components work properly and safely. In this article, we’ll walk you through the process of wiring a 30 amp plug step by step.
Whether you’re a seasoned RVer or a newbie looking to dive into the world of RVing, knowing how to wire a 30 amp plug is an essential skill. With the right tools and knowledge, you can easily wire up your RV’s electrical system and hit the road with confidence.

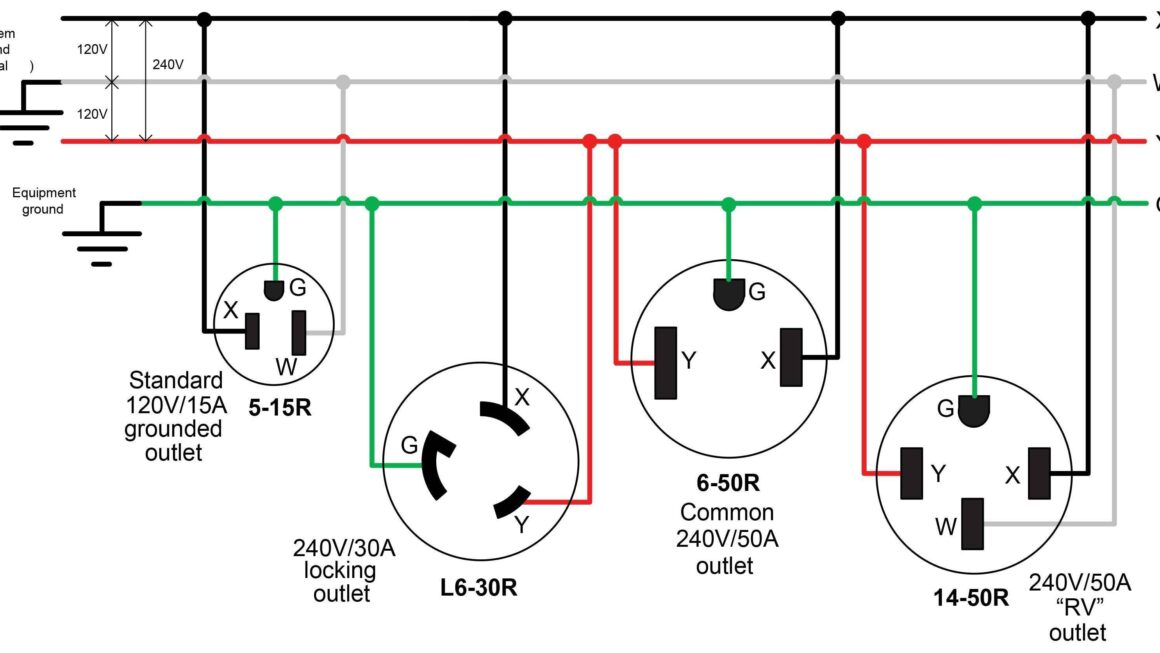
Related Post Basic Wiring Diagram For Light Switch
1. Begin by stripping the insulation off the ends of the wires, exposing about 1/2 inch of bare wire. You should see three wires inside the cord – black (hot), white (neutral), and green (ground).
2. Connect the black wire to the brass terminal screw, the white wire to the silver terminal screw, and the green wire to the green terminal screw. Make sure to tighten the terminal screws securely to ensure a solid connection.
3. Once you’ve connected all the wires, double-check your work to ensure everything is properly secured and there are no loose connections. Wrap each connection with electrical tape for added safety.
4. Finally, plug your RV into a 30 amp power source and test the electrical system to ensure everything is working correctly. If you encounter any issues, double-check your wiring connections and troubleshoot as needed.
With these simple steps, you can confidently wire up a 30 amp plug for your RV and hit the road with peace of mind. Always prioritize safety when working with electrical systems and never hesitate to seek professional help if needed.
Download and Print Rv 30 Amp Plug Wiring Diagram Listed below