If you’re looking to understand how to wire a 50 amp plug for your RV, you’ve come to the right place. This article will break down the process in an easy-to-follow manner, so you can get your RV up and running in no time.
Whether you’re a seasoned RVer or just starting out, knowing how to properly wire a 50 amp plug is essential for ensuring your electrical system functions correctly. With the right tools and knowledge, you can tackle this project with confidence.

Related Post Wiring Diagram For A 3 Way Dimmer Switch
Start by turning off the power to your RV and unplugging it from the electrical source. Next, remove the cover from the 50 amp plug and carefully strip the outer insulation from the wires. Be sure to double-check the wiring diagram for your specific plug to ensure you’re connecting the wires correctly.
Once you’ve connected the wires to the appropriate terminals on the plug, secure them in place with the screwdriver. Use electrical tape to cover any exposed wires and ensure a safe connection. Before plugging your RV back in, use a voltage tester to check that the plug is wired correctly and there are no issues.
With the wiring complete, you can now plug your RV back in and enjoy reliable power for all your electrical needs. By following this simple guide, you can confidently wire a 50 amp plug for your RV and hit the road with peace of mind.
Now that you have a better understanding of how to wire a 50 amp plug for your RV, you can tackle this project with confidence. Remember to always prioritize safety and double-check your connections before using any electrical equipment. With the right tools and knowledge, you’ll be hitting the open road in no time.
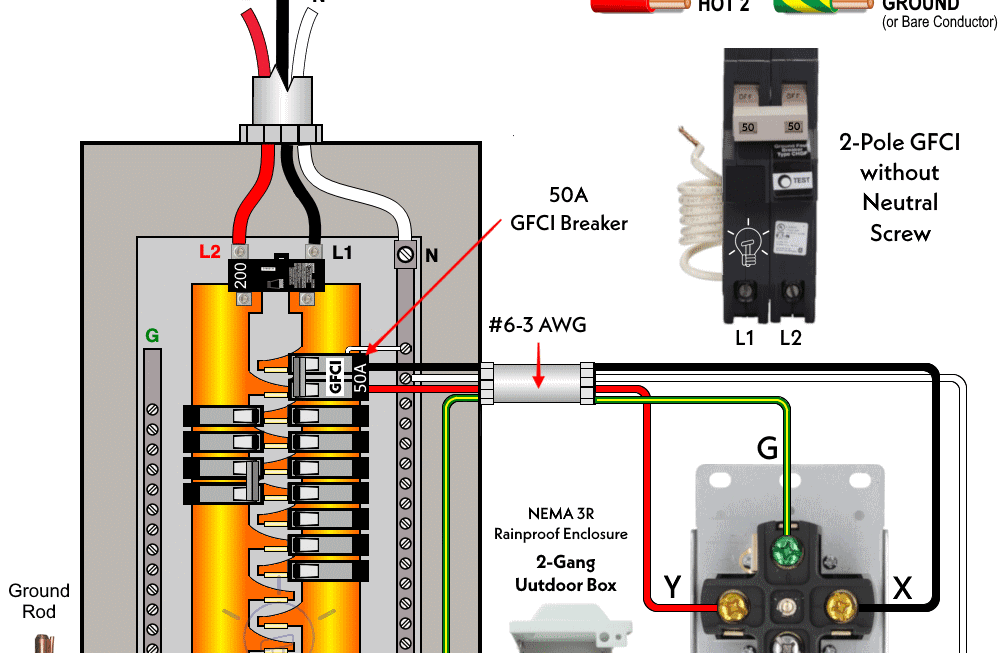
Download and Print Rv 50 Amp Plug Wiring Diagram Listed below