Thinking about installing or repairing your RV air conditioning unit? Understanding the wiring diagram is crucial for getting the job done right. Whether you’re a seasoned DIYer or a newbie, this guide will help you navigate the complexities of RV air conditioning wiring.
With the right knowledge, tools, and a bit of patience, you can tackle this project like a pro. In this article, we’ll break down the RV air conditioning wiring diagram in simple terms, so you can confidently tackle your RV maintenance or upgrade project.

Related Post Wiring Diagram For 6 Wire Trailer Plug
Next, identify the power source for your RV air conditioning unit. This could be a generator, shore power, or battery. The wiring diagram will show you how to connect the unit to the power source safely and efficiently. Make sure to follow the manufacturer’s instructions closely to avoid any mishaps.
Once you’ve located the power source, it’s time to connect the wires according to the wiring diagram. This step requires precision and attention to detail to ensure that each wire is correctly connected to the corresponding component. Double-check your connections before powering up the unit to prevent any electrical issues.
After connecting the wires, test the RV air conditioning unit to ensure that it’s running smoothly. Monitor the temperature, airflow, and overall performance to make sure everything is in working order. If you encounter any issues, refer back to the wiring diagram to troubleshoot and resolve the problem.
In conclusion, understanding the RV air conditioning wiring diagram is essential for maintaining, repairing, or upgrading your RV’s cooling system. By following the guidelines outlined in this guide, you can confidently tackle any RV air conditioning project with ease. Remember to prioritize safety and accuracy when working with electrical components, and don’t hesitate to seek professional help if needed.
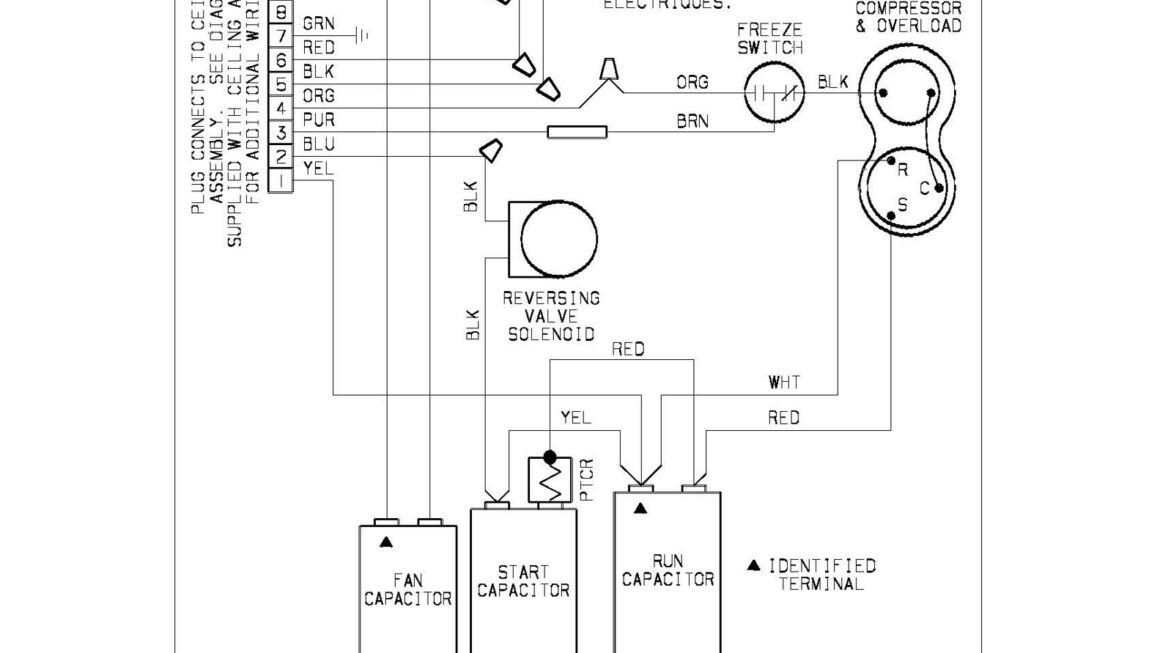
Download and Print Rv Air Conditioning Wiring Diagram Listed below