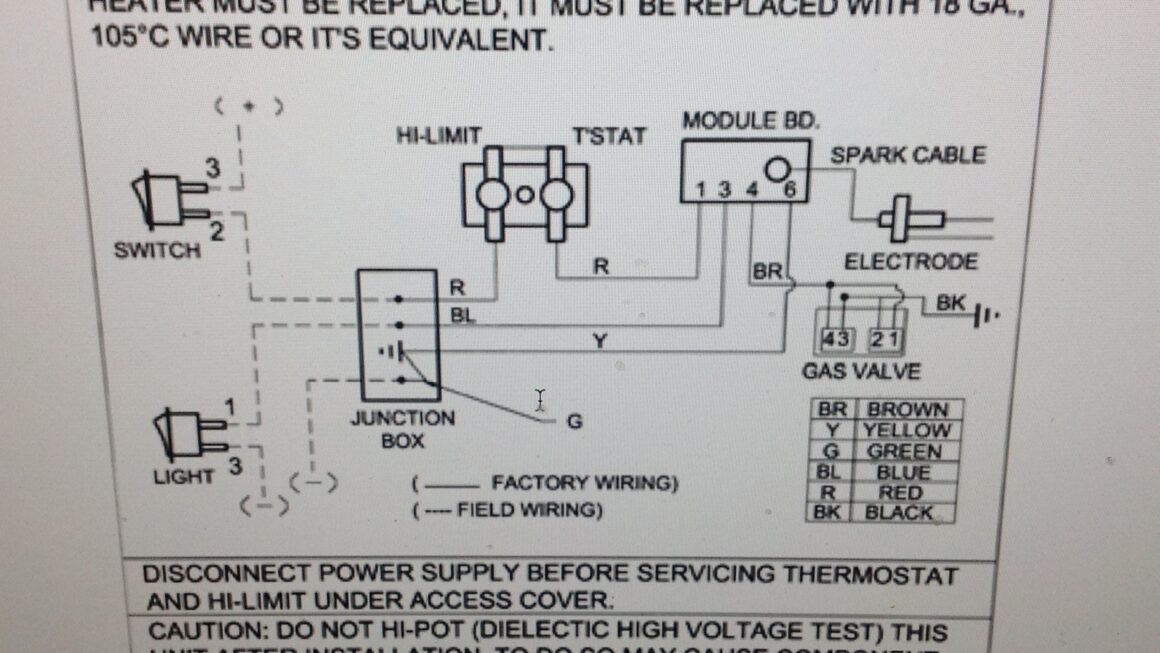
If you’re looking to install or repair your RV water heater, understanding the wiring diagram is crucial. Proper wiring ensures your water heater operates efficiently and safely. In this article, we’ll break down the RV water heater wiring diagram to help you navigate the process with ease.
Whether you’re a seasoned RVer or new to the world of recreational vehicles, having a basic understanding of the wiring diagram is essential. By familiarizing yourself with the components and connections, you can troubleshoot issues and make necessary repairs without the need for professional help.

Related Post Trailer Wiring Diagram 4 Way
1. Power Source: The wiring diagram will show how the power source, whether it’s propane or electricity, connects to the water heater. This connection is crucial for providing the necessary energy to heat the water inside the tank.
2. Thermostat: The thermostat regulates the temperature of the water inside the tank. The wiring diagram will illustrate how the thermostat is wired to the heating element and how it controls the heating process.
3. Heating Element: The heating element is responsible for heating the water in the tank. The wiring diagram will outline how the heating element is connected to the power source and thermostat to ensure proper functionality.
4. Safety Features: Many RV water heaters come equipped with safety features such as pressure relief valves and temperature sensors. The wiring diagram will detail how these safety features are integrated into the overall system to protect against potential malfunctions.
By understanding the RV water heater wiring diagram, you can confidently tackle any installation or repair tasks that come your way. Remember to always refer to the manufacturer’s instructions and guidelines to ensure a safe and reliable operation of your RV water heater.
Download and Print Rv Water Heater Wiring Diagram Listed below