If you’re looking to understand how to wire a 3 wire alternator, you’ve come to the right place. It may sound complicated, but with a simple wiring diagram, you’ll be able to tackle this project with ease.
Whether you’re a DIY enthusiast or a professional mechanic, having a clear and concise wiring diagram can make all the difference. No need to stress – we’ve got you covered with an easy-to-follow guide.

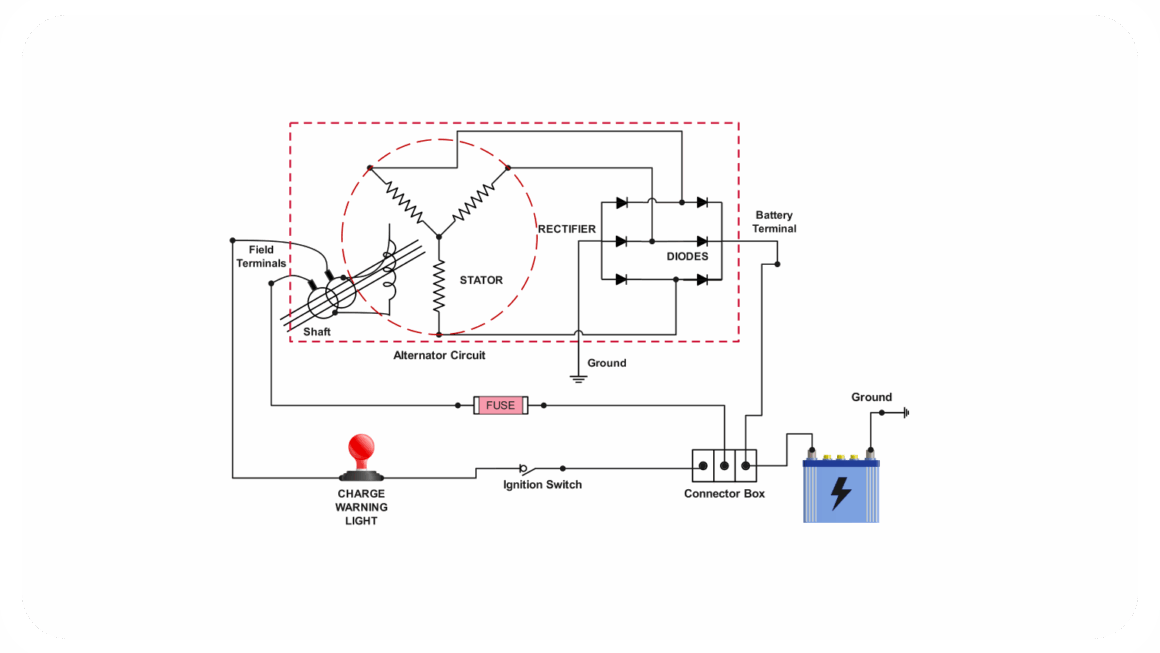
Related Post Alternator Wiring Diagram 3 Wire
Next, you’ll want to connect the red wire from the alternator to the battery’s positive terminal. This will allow the alternator to charge the battery and power your vehicle’s electrical system. Make sure to secure the connection to prevent any loose wires.
Then, connect the black wire from the alternator to the battery’s negative terminal or a solid ground on the vehicle’s chassis. This will ensure proper grounding for the alternator, allowing it to function efficiently and safely.
Finally, connect the white wire from the alternator to the ignition switch or dashboard light. This wire provides the alternator with a signal to start charging when the engine is running. It’s a crucial step in the wiring process to ensure your alternator functions correctly.
In conclusion, wiring a 3 wire alternator doesn’t have to be daunting. With a simple wiring diagram and a clear understanding of the wires involved, you’ll be able to successfully wire your alternator with confidence. Remember to double-check your connections and ensure everything is secure before starting your vehicle.
Download and Print Simple 3 Wire Alternator Wiring Diagram Listed below