So you’ve decided to tackle a simple wiring project at home, but you’re not quite sure where to start. Don’t worry, we’ve got you covered! In this article, we’ll walk you through a basic wiring diagram for a light switch, making it easy for even beginners to follow along.
Before we dive into the wiring diagram, it’s important to gather all the necessary tools and materials. You’ll need a screwdriver, wire stripper, electrical tape, and of course, the light switch itself. Once you have everything ready, it’s time to get started!

Related Post White Rodgers Thermostat Wiring Diagram
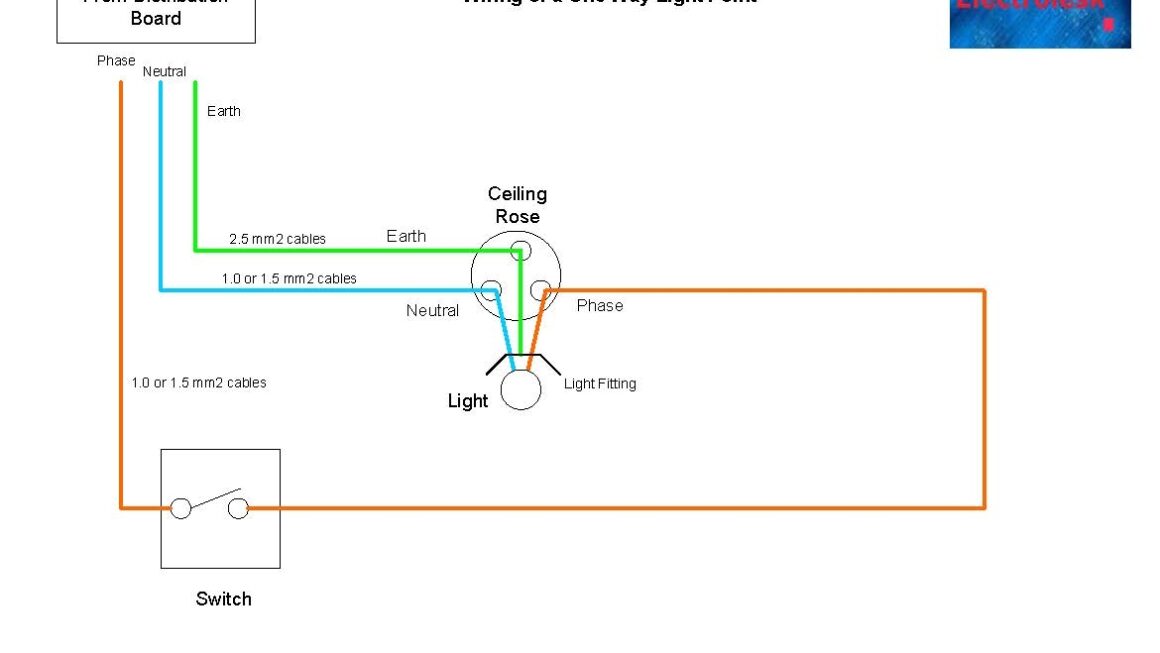
Now, it’s time to install the new light switch. Connect the black wire to the “hot” terminal, the white wire to the neutral terminal, and the green or bare copper wire to the ground terminal. Make sure to tighten the screws securely to ensure a proper connection.
Once all the wires are securely connected, carefully tuck them back into the electrical box and attach the new switch to the wall. Finally, screw the switch cover back on and turn the power back on at the breaker box. Congratulations, you’ve successfully installed a new light switch!
With this simple wiring diagram for a light switch, you can confidently tackle small electrical projects around your home. Remember to always prioritize safety and double-check your work before restoring power. Happy wiring!
Download and Print Simple Wiring Diagram For Light Switch Listed below