Are you looking to install a single pole switch in your home but not sure where to start? Look no further! In this article, we will provide you with a simple and easy-to-follow single pole switch wiring diagram to help you get the job done right.
Before we dive into the wiring diagram, let’s first understand what a single pole switch is. A single pole switch is the most basic type of switch that is used to control lights or appliances from a single location. It has two brass screw terminals and a green ground screw.

Related Post 3 Way Electrical Wiring Diagram
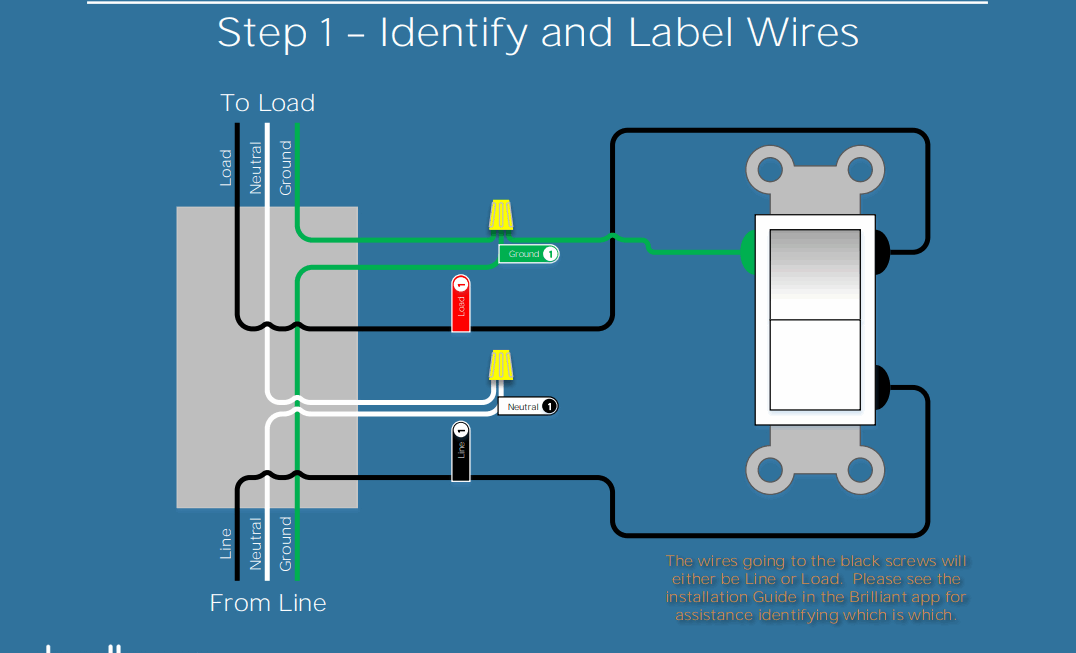
Next, identify the hot wire (usually black) and the neutral wire (usually white). Connect the hot wire to one of the brass screw terminals on the new switch and the neutral wire to the other brass screw terminal. If there is a ground wire, connect it to the green ground screw on the switch.
Once the wires are securely connected, carefully tuck them back into the electrical box and attach the switch to the box using the screws provided. Finally, replace the cover plate and turn the power back on to test the switch. If done correctly, you should now be able to control your lights or appliances with ease!
Remember, safety always comes first when working with electricity. If you are unsure or uncomfortable with any part of the wiring process, it is always best to consult a professional electrician to ensure the job is done safely and correctly.
With this simple single pole switch wiring diagram, you can confidently tackle this DIY project and add a convenient switch to your home. So go ahead, grab your tools, and get ready to upgrade your lighting control in no time!
Download and Print Single Pole Switch Wiring Diagram Listed below